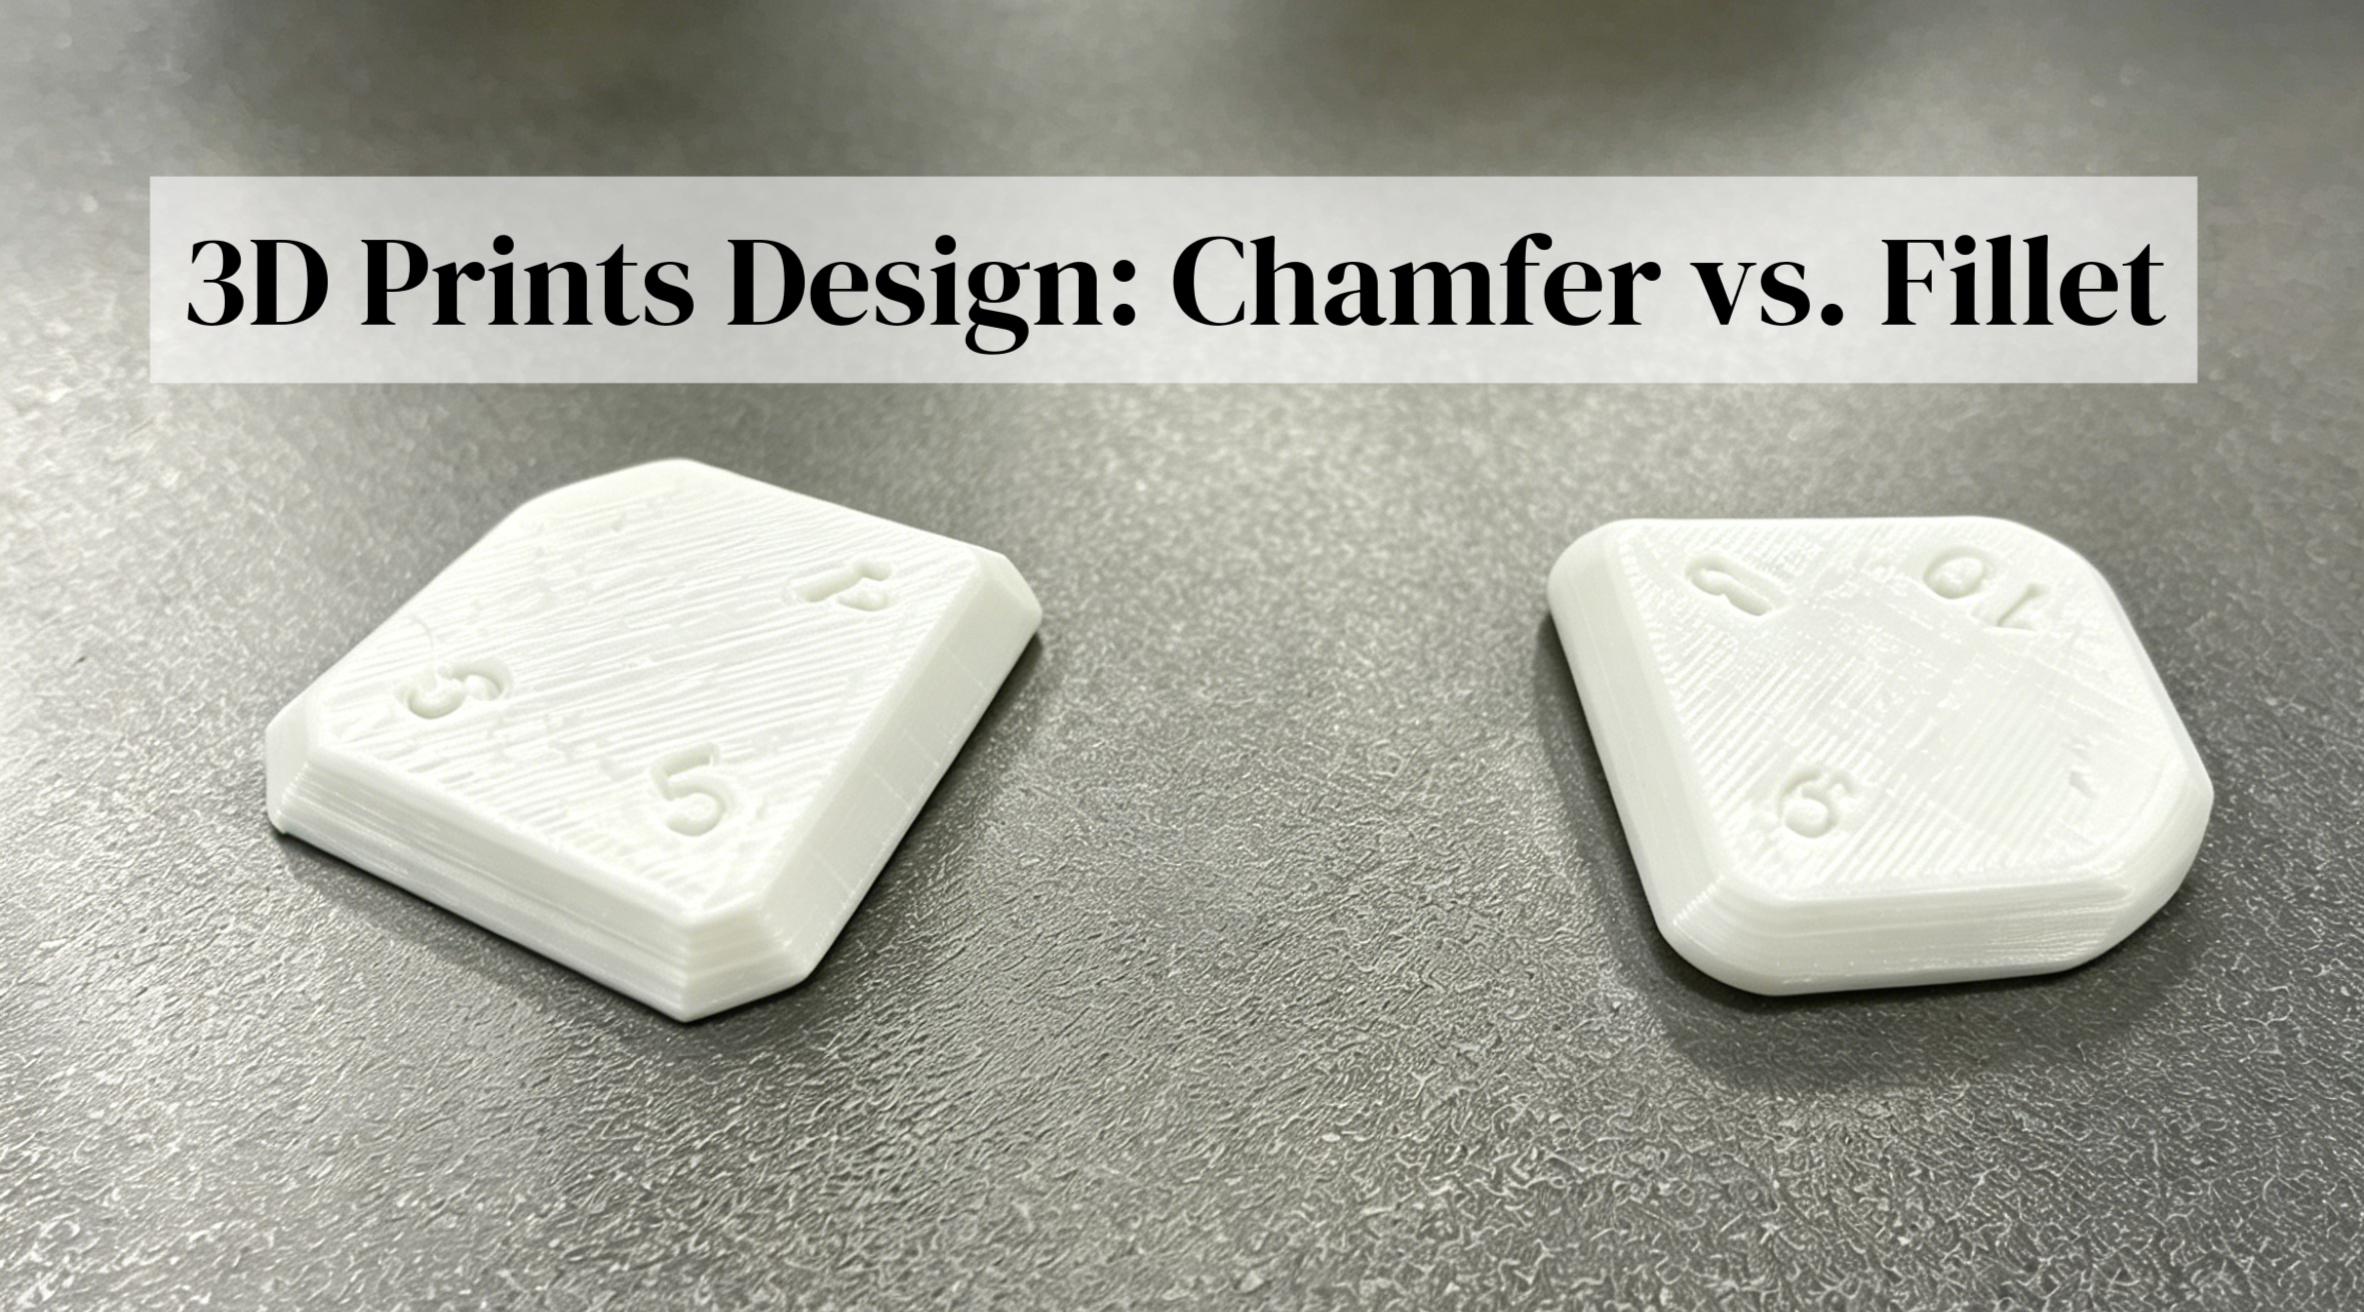
Every sharp corner you encounter while creating components for FDM 3D printing offers you a decision: leave it as is, chamfer it with a bevel, or fillet it with a curve. In the setting of FDM 3D printing, this guide describes the main distinctions between fillets and chamfers and their effects on printability, strength, and beauty.
Understanding What They Are
Design elements used to soften sharp edges or corners include chamfers and fillets. They can both have purposes that help the structure, or just look visually great. Still, in FDM 3D printing, their “work principle” differs drastically, given layer-by-layer adhesion and the lack of cutting tools.
You are adding material in an additive approach instead of taking it away in a subtractive one. A sharp 90° corner causes an abrupt shift in cross-section, which results in low-layer bonding and tension buildup. By progressively redistributing material, fillets and chamfers increase the adhesion of layers and guide the forces throughout the component.
What Is a Chamfer?
A chamfer is a transitional edge that is angled, typically 45°, connecting two surfaces. It is essentially a “beveled” or “cut-off” corner. The chamfer replaces a sharp horizontal overhang with a sloped ramp.
What Is a Fillet?
A fillet is a rounded transition, whether concave interior or convex exterior, connecting two surfaces. It follows a radius, where the fillet creates a smooth, curved surface. An outer fillet that rounds the outside corner may create a severe overhang. An internal fillet that rounds the inside corner helps strengthen the joint.
Advantages and Disadvantages?
In 3D printing, the difference between fillet and chamfer provides some unique advantages and disadvantages. For quick reference, the table below provides a side-by-side comparison of the chamfer vs fillet debate.
Chamfer
A chamfer is generally easier to print and model, but it provides less stress relief than a fillet, especially on chamfered edges, for instance.
| Aspect | Details for 3D Printing |
| Advantages | Excellent for overhangs: A 45° chamfer prints perfectly without supports.Easy assembly: Guides parts together (e.g., square peg into a hole).Flat surface for probing: Provides a flat landing for calipers or bed probing.Easy to model: Simple extrude-cut or sketch operation. |
| Functions | Reduces stress concentration (moderately).Eliminates sharp, fragile tips.Improves part fit in assembly. |
| Disadvantages | Sharp internal corner at the chamfer’s root (stress riser remains).Less effective than fillets for load distribution.It can look “mechanical” or unfinished. |
| Printing Issue | If the angle < 45° from horizontal, it still requires supports. But 45° is ideal. |
Fillet
A fillet excels at eliminating stress concentrations and improving strength, but it can create difficult-to-print overhangs on external bottom edges.
| Aspect | Details for 3D Printing |
| Advantages | Best for strength: Eliminates stress concentration almost entirely. Smooth appearance: Professional, organic look.Better layer adhesion on internal corners (compression). |
| Functions | Maximizes fatigue resistance.Eliminates sharp internal points where cracks start.Improves aerodynamic/fluid flow. |
| Disadvantages | Poor for external overhangs: A horizontal fillet creates >45° overhang → needs supports. Difficult to dimension in CAD (radius vs. simple angle). Small fillets (< R0.5) may disappear due to nozzle size. |
| Printing Issue | External bottom fillet: starts at 0° overhang, then gradually increases. This requires support or will droop. |
When to Use Chamfer?
Chamfers are ideal for situations where you need support-free overhangs, easy assembly, or quick post-processing.
- If you need a support-free overhang, a 45° chamfer on the bottom edge of a part allows it to print directly on air without supports. Example: a button or a protruding ledge.
- If parts require assembly or alignment, use a chamfer as the leading edge of a peg or the mouth of a hole. This creates a “lead-in” for easy insertion.
- If you need a flat reference surface, chamfers provide a stable landing for digital calipers or for sitting on a print bed.
- If you wish to reduce post-processing time, chamfers are easier to sand or scrape than rounded fillets.
Applications:
- Snap-fit hooks where you chamfer the tip for easier engagement.
- Threads’ support is thanks to chamfered start/end of screw threads.
- Enclosure lids where you chamfer the edge for a tight fit.
- Tool handles opt for a chamfer to remove sharp chamfer edges without losing grip.
When to Use Fillet?
Fillets are the better choice when structural strength, fatigue resistance, or a smooth organic appearance is required.
- If structural strength is critical, Internal fillets, where a vertical wall meets a horizontal floor, dramatically increase layer adhesion and prevent part splitting.
- When load is cyclic or bending, a fillet line helps eliminate sharp internal corners that act as “stress risers.” Example: a bracket or a lever.
- If appearance matters for consumer products, ergonomic grips and organic shapes look better with fillets.
- When you can print the fillet vertically or on top, as top fillets print perfectly, internal fillets print well because they are supported by previous layers.
Applications:
- Mechanical brackets, using the fillet at the base of ribs.
- Living hinges use a fillet for the transition zone.
- Drone arms use internal fillet corners for impact resistance.
- Organic sculptures or handles.
When to Use Them Together?
In complex functional parts, combining chamfers and fillets yields the best results for printability, strength, and assembly.
| Location | Feature | Why |
| External bottom edge | Chamfer (45°) | Eliminates support material. A fillet here would droop. |
| Internal corner | Fillet (R2–R5) | Eliminates stress concentration; prevents layer separation. |
| Assembly lead-in | Chamfer (30°–45°) | Guides parts together without jamming. |
| Exterior visible surface | Fillet (small R1–R3) | Smooth, professional appearance; no sharp edges. |
| Top sharp edge | Either | Both work. Chamfer is easier; fillet looks better. |
Choosing a kind of filament which can be compatible with chamfer and fillet is also important. PLA filament is recommended, due to its hardness, fast cooling, and stable forming.
Conclusion
By having read our guide on the layer-by-layer reality of FDM printing, you should now be able to design parts that print faster, require less post-processing, and perform better under load. The key takeaway is to choose chamfer when you need overhang control, assembly guidance, or simplicity. Choose fillet when you need strength, smooth aesthetics, or fatigue resistance. Choose both for professional-grade 3D printed parts, where you chamfer the outside bottom and fillet the inside corners.