For anyone who has 3D printed more than a few times, chances are that they have experienced their 3D prints slowly peeling off the bed during the process. Most of the time, this leads to a failed result because of warping or other problems, because the 3D model does not adhere well enough to the bed. The solution is to use a brim to help secure the object snugly on the print bed. So let us take a closer look at how it works.
What Is a Brim in 3D Printing?
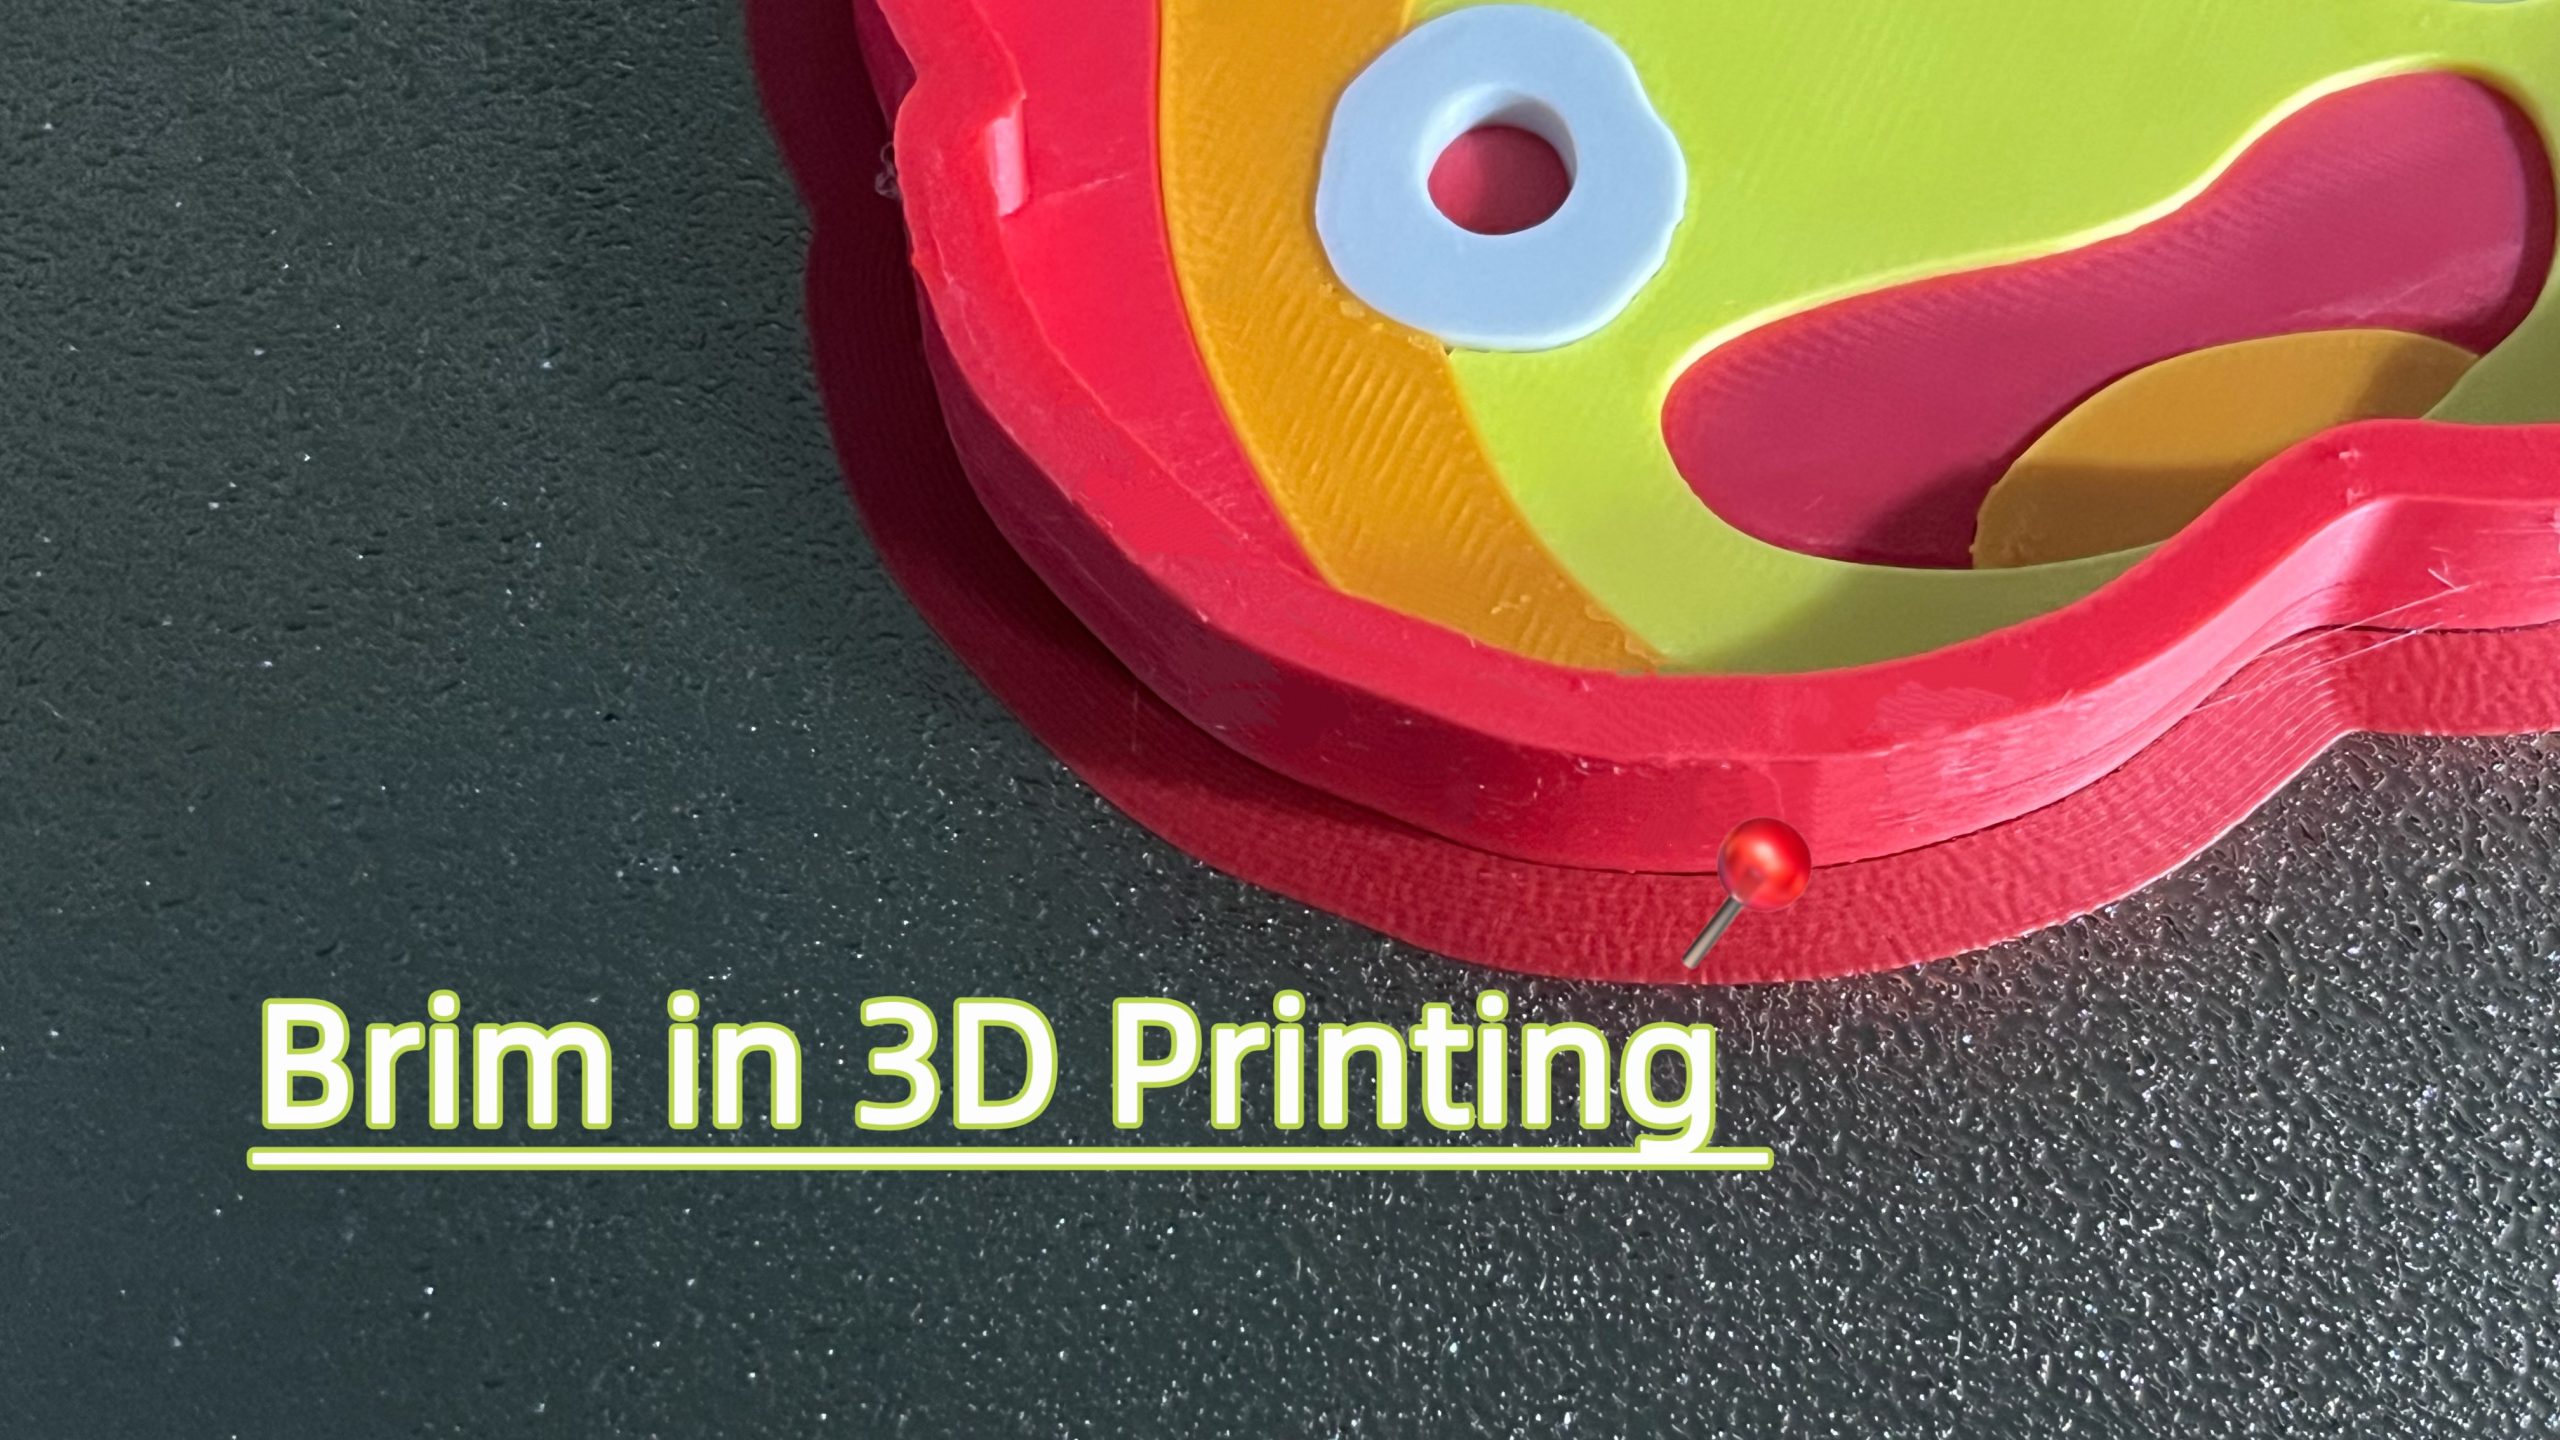
As the name suggests, brim refers to the extended part of a hat used for covering. Similarly, in 3D printing, it also refers to the extended part. The part that extends from the first layer is mainly used to prevent the edges of the prints from warping.
A brim is not a support structure in the traditional sense, but rather a build plate adhesion aid. When comparing raft vs. brim, both serve to improve first-layer adhesion, but they differ significantly in cost and complexity. A raft is more time-consuming and material-intensive, while a brim consists of a single-layer extension around the base of the model. Brims are quick to generate, use minimal material, and are often sufficient for improving print reliability.
Purpose of a Brim
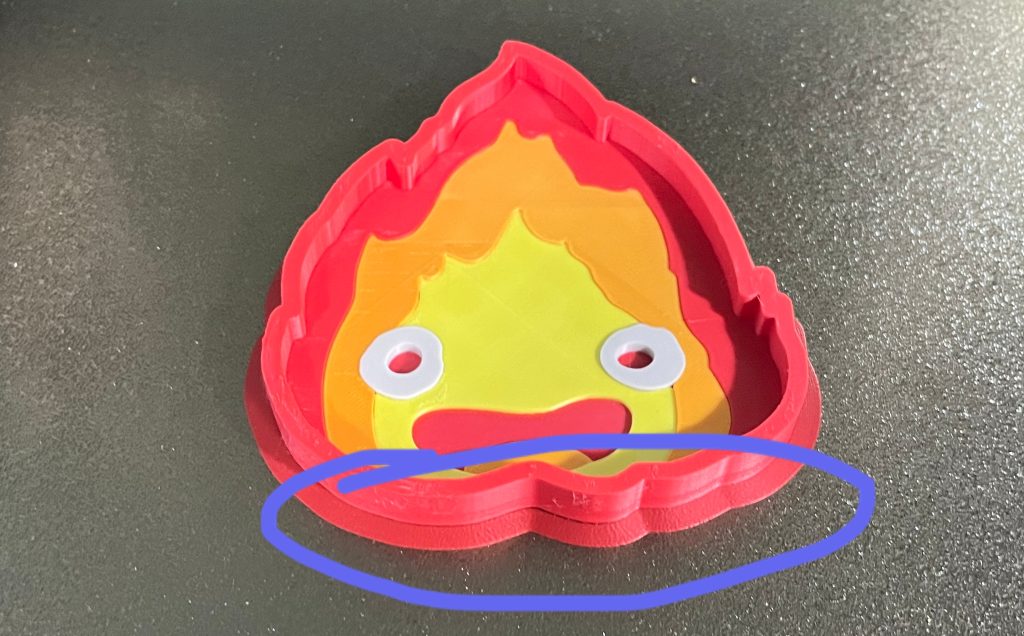
The main purpose of using a 3D printing brim when producing your designs, is to help the bed adhesion of your objects. The brim makes a much larger contact area, which helps risk of corners and edges lifting while printing. The brim can also provide more stability for tall objects or narrow models, making them less likely to fall over because of limited footprint or printer-induced vibrations.
When to Use a Brim in 3D Printing?
Okay, so now you know the definition and purpose of a brim, let’s look at when to use them.
Model with a Small Contact Area
Generally speaking, it is a good idea to use brim when printing small models that do not have much contact area on the bed itself. Think of it like glue, adding some more to help fix the model during printing. Small models generally require more anchoring.
Materials with High Risk of Warping
Some 3D printing filaments are at a greater risk of warping than others. For instance, ABS, ASA and nylon exhibit relatively high thermal shrinkage as they cool. This shrinkage generates internal stress, increasing the likelihood of edges or corners lifting and losing proper adhesion to the build plate. The same goes for some polycarbonate filaments as well.
Tall & Slender Models
Like models that have a small contact area, if the 3D printed object is very tall or very narrow, it can also be necessary to use brims since these designs have a high center of gravity that makes it easy for them to topple over or detach. By increasing the effective base area, a brim improves stability and reduces the risk of detachment.
Models with Pointed or Narrow Bases
If your models don’t have fully flat bottoms, it can also be a good idea to add a brim as it will add base contact area to 3D print models for improving lateral stability and helping the print remain securely attached to the build plate.
Marginal Bed Adhesion
If first-layer adhesion is inconsistent or borderline, and the printer is otherwise properly calibrated, using a 3D printer brim can improve overall print reliability. Think of it as a safety net that provides additional bed adhesion.
Common Cases of Brim Misuse
On the other hand, some models might not need a brim, and not using one can help speed up the print and cut down on material use.
Models with a Large, Flat Base
If your model already has a large and flat bottom portion, it will most likely adhere well to the print bed on its own. Therefore, you will not need to consider brim 3D printing techniques.
model from Quentinyu@Makerworld
High-Detail or Aesthetic Parts
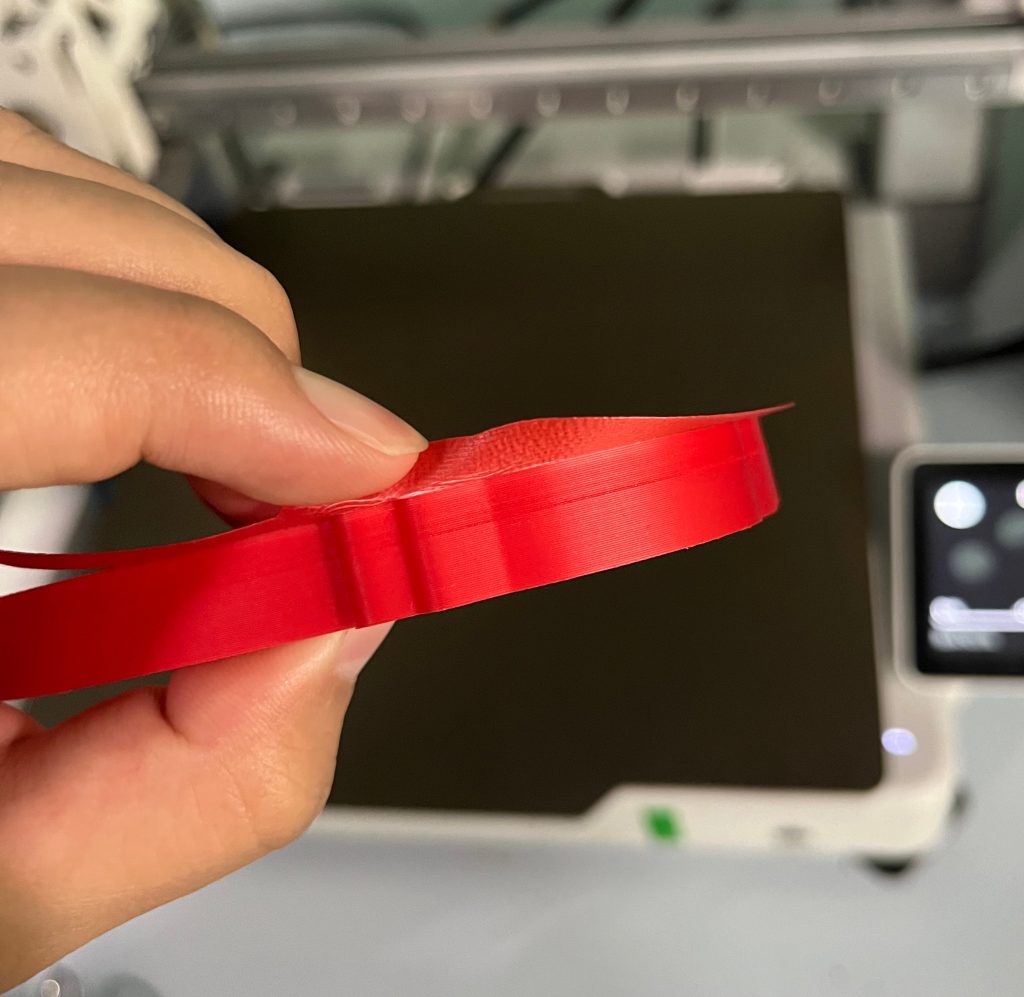
Some models might traditionally need a brim, but please remember that the brim leaves a rough edge where it detaches, requiring post-processing. Brims can leave minor marks along the base of a print. This can be a concern for parts where the bottom surface is visually critical, but it is usually acceptable for prints that will undergo extensive post-processing.
Fix Problems Caused by Improper Settings
A brim cannot fundamentally solve the problems of gaps, unevenness and uneven line width in the first layer of prints. Brim should only be enabled when the first layer itself is perfect but still needs to prevent warping.
Using a brim instead of proper bed leveling and cleaning is wrong. A brim only increases surface contact, since it does not restore proper mechanical or surface adhesion.
How to Add a Brim in Slicer
Almost all popular 3D printing software makes it easy to add a brim to an existing 3D model. Below, we will take a look at some of the most common slicers.
Bambu Studio
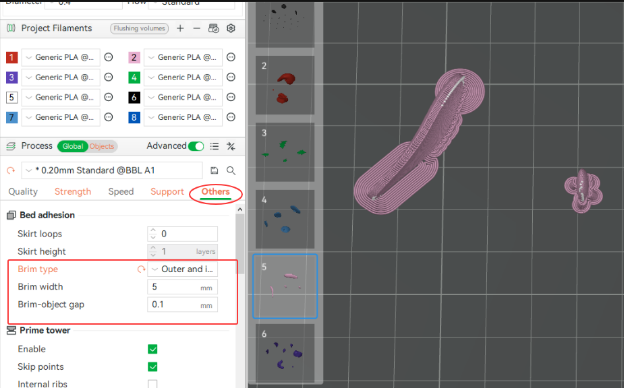
When opening up Bambu Studio, first select your chosen 3D file in the prepare view section. Then click on the “Others” section, where you will then see 3D print brim settings. You can enable the brim here and then choose to adjust the brim width and gap parameters as you need.
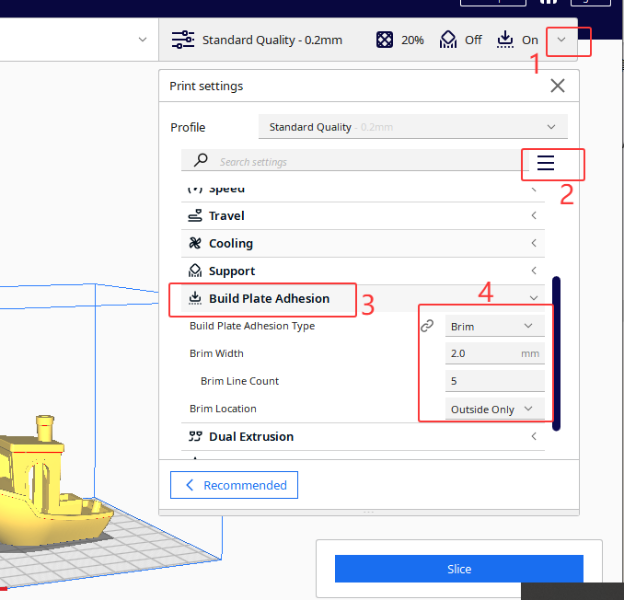
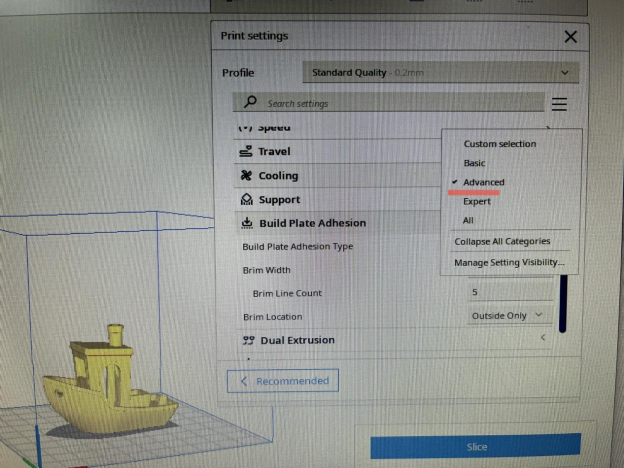
Cura
In the print settings panel on the right, ensure you are in “Advanced” mode. For this to happen, you may need to click step 2, there are many settings configurations, so choose “Advanced”. Search for “Build Plate Adhesion Types” in the settings search bar. Set the “Build Plate Adhesion Type“ to “Brim”.
How to Set Brim Parameters
Ok, it is also important to know what the typical parameter settings look like. Below, we will provide what we have found works best for most prints, but feel free to experiment as you feel.
Brim Width
Typical range: 5–10 mm.
The brim width controls how far the brim extends from the model. Wider brims improve adhesion for tall or warp-prone models but use more filament and require more cleanup.
Brim Lines
Typical setting: 5–15 lines depending on model size.
The number of brim lines refers to the number of concentric lines around the model’s base. The more lines you add, the better adhesion to the bed while brim printing, but it uses more material and takes more time as well. So balancing this out can be a good idea.
Brim Gap
Typical setting: 0–0.4 mm.
The gap setting decides how wide the gap between the brim and the model itself is. The wider the gap, the easier removal. But the wider you make the brim object gap, the less adhesion to the bed the brim will actually provide.
Brim Type
Finally, you will also get the option to choose between some different types of brims. Most slicers have the following options at the very least. Full brim is the most common, but the outer-only brim can be a good option as it reduces the number of contact points, making it easier to remove afterwards.
- Full brim: Standard, connects to all edges
- Outer-only brim: Only outermost perimeter (Cura)
- Inner brim: Experimental for specific cases
Conclusion
A brim is a simple but powerful tool in 3D printing to combat warping and improve bed adhesion for models with challenging geometries or made from tricky materials. While a brim is important, a well-calibrated 3D printer and a properly cleaned bed surface are most important to get the best and most reliable results. Happy printing!