PETG is a strong and slightly flexible 3D printer filament that is easier to print with, compared to other 3D printing filaments like ABS. That doesn’t make it immune to issues, though. This article covers how to troubleshoot typical PETG printing issues such as stringing, first layer adhesion, weak interlayer adhesion, nozzle clogging, and rough surfaces. Enjoy!
PETG Stringing
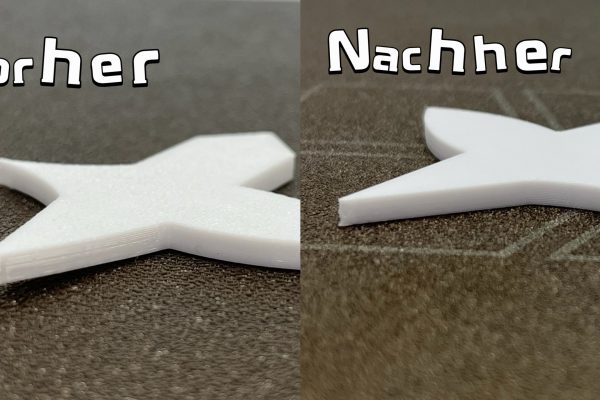
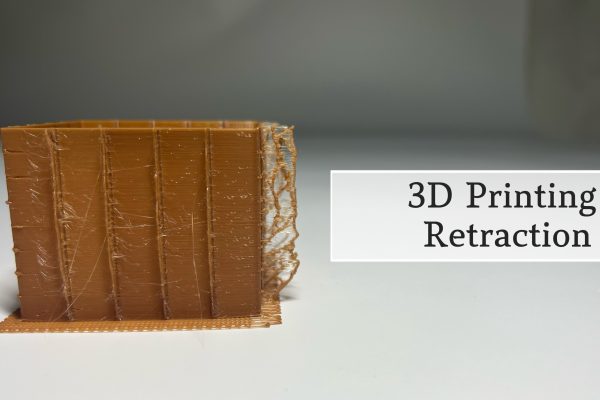
Stringing is a very common problem when printing with 3D printing filament PETG, and is defined as a thin filament that stretches across the gap of the print. Stringing occurs when the molten layer of PETG seeps out of the nozzle while the nozzle moves non-printing directional moves. This can happen for a number of reasons, such as incorrect retraction settings, excessive heat, or the surrounding environment.
Reasons and Solutions
- High Printing Temperature: PETG filament has good flow at higher temperatures, with the downside of creating excessive oozing.
Solution: Lower the PETG printing temperature to 220–240°C, depending on your filament brand and printer. Test in 5°C increments to find the sweet spot where extrusion is smooth without stringing. - Improper Retraction Settings: Insufficient retraction distance or slow retraction speed fails to pull molten plastic back into the nozzle, causing it to leak during travel.
Solution: Set retraction distance to 5–8 mm and retraction speed to 40–50 mm/s. Adjust these in small increments in your slicer (e.g., Cura, PrusaSlicer) and test with a stringing test model. - Slow Nozzle Travel Speed: If the nozzle moves too slowly over open spaces, molten PETG can ooze, forming strings.
Solution: Increase travel speed to 100–200 mm/s or higher in non-print areas. Enable “Z Hop” (Lift Z) in your slicer to raise the nozzle slightly (0.2–0.5 mm) during travel, preventing dragging. Note that Z Hop may slightly increase print time. - Wet Filament: The moisture absorbed by PETG will become steam during the printing process and lead to increased oozing and stringing.
Solution: Dry the filament with a filament dryer or in the oven at 60–70°c for 4–6 hours. Store the filament in a sealed container with a desiccant so it doesn’t reabsorb moisture. - Poor Nozzle Condition: A nozzle that is worn out, or dirty can cause inconsistent extrusion and leaking.
Solution: You can clean the nozzle by a wire brush and/or perform a cold pull with cleaning filament. You may want to replace the nozzle if it is worn out or damaged.
The Adhesion Problem of the First Layer
The first layer of any successful PETG 3D printer filament operation is the most important to get right. It is especially important with PETG that you achieve good bed adhesion. If the first layer doesn’t stick to the build plate well, you risk warping and curling as well as the print possibly falling completely off the build plate and destroying the print early on in the process.
Reasons and Solutions
- Incorrect Nozzle Height (Z-Offset): If the nozzle is too low, the filament may be squished too much or even scraped off the bed. If it’s too high, the filament won’t properly adhere to the print surface and may lead to under-extrusion in the first layer.
Solution: To fix this, you can just re-level the bed and properly calibrate Z-offset to squish the first layer just so it is forming smooth and gap-free lines. Use a first-layer test print to fine-tune as well. - Unsatisfactory Bed Temperature: A cold bed reduces adhesion, while an overly hot one can cause “elephant’s foot” (bulging at the base).
Solution: Set the PETG bed temperature to 80–90°C, depending on the filament and bed type. Test in 5°C increments to avoid over- or under-adhesion. - Dirty Bed: Dust, oils, or leftover filament prevent proper adhesion.
Solution: Clean the build surface with 70%+ isopropyl alcohol or warm soapy water before every print. - Cooling Fan On Too Early: Early cooling causes rapid shrinkage, preventing proper bonding to the bed.
Solution: Disable the cooling fan for at least the first 2–5 layers to allow the filament to stay optimal temp and stick properly. - Unsuitable Printing Environment: Drafts or low ambient temperatures lead to uneven cooling and warping.
Solution: Use an enclosure or draft shield to maintain a stable environment around 20–25°C. - Poor First Layer Contact Area: Small or sharp-edged prints may not grip the bed well enough.
Solution: Add a skirt to prime the nozzle, a brim (5–10 mm) to increase surface contact, or mouse ears on corners to prevent lifting. - Incompatible or Worn Bed Surface: Some surfaces may be too smooth or degraded over time.
Solution: Apply a thin layer of glue stick, hairspray, or bed adhesive on glass. Replace worn PEI sheets or rough them up slightly with fine sandpaper (e.g., 2000 grit).
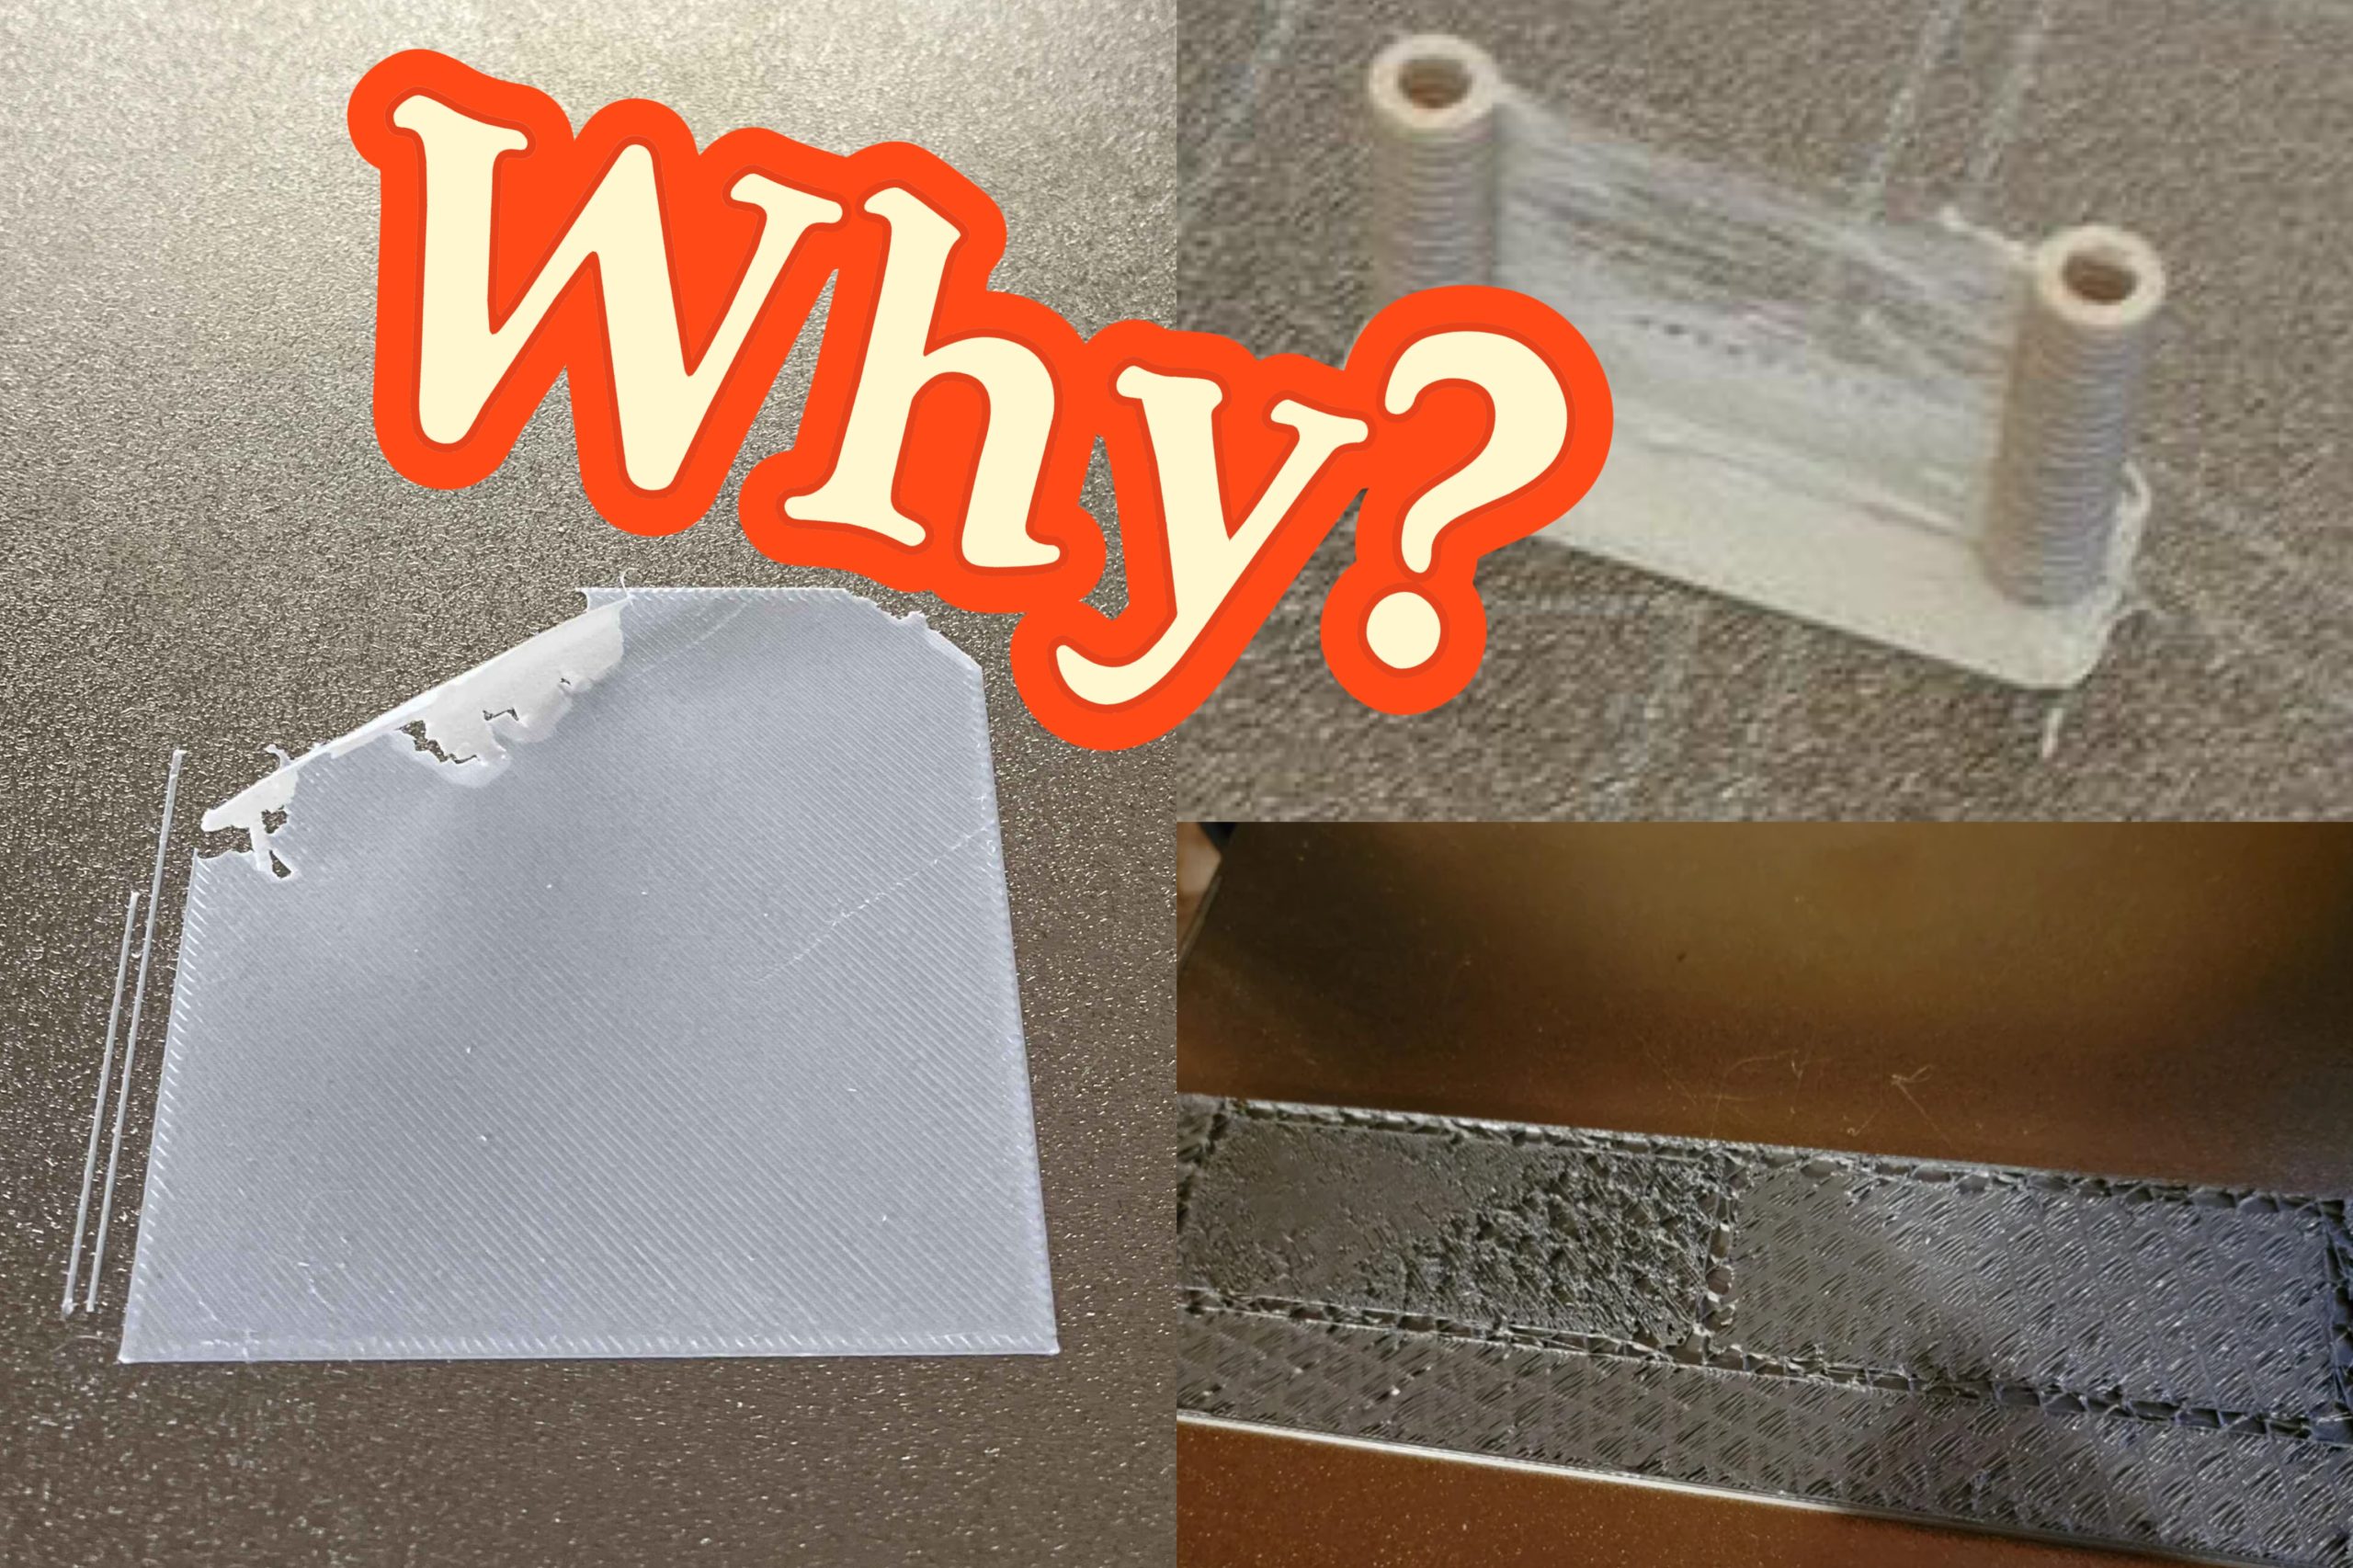
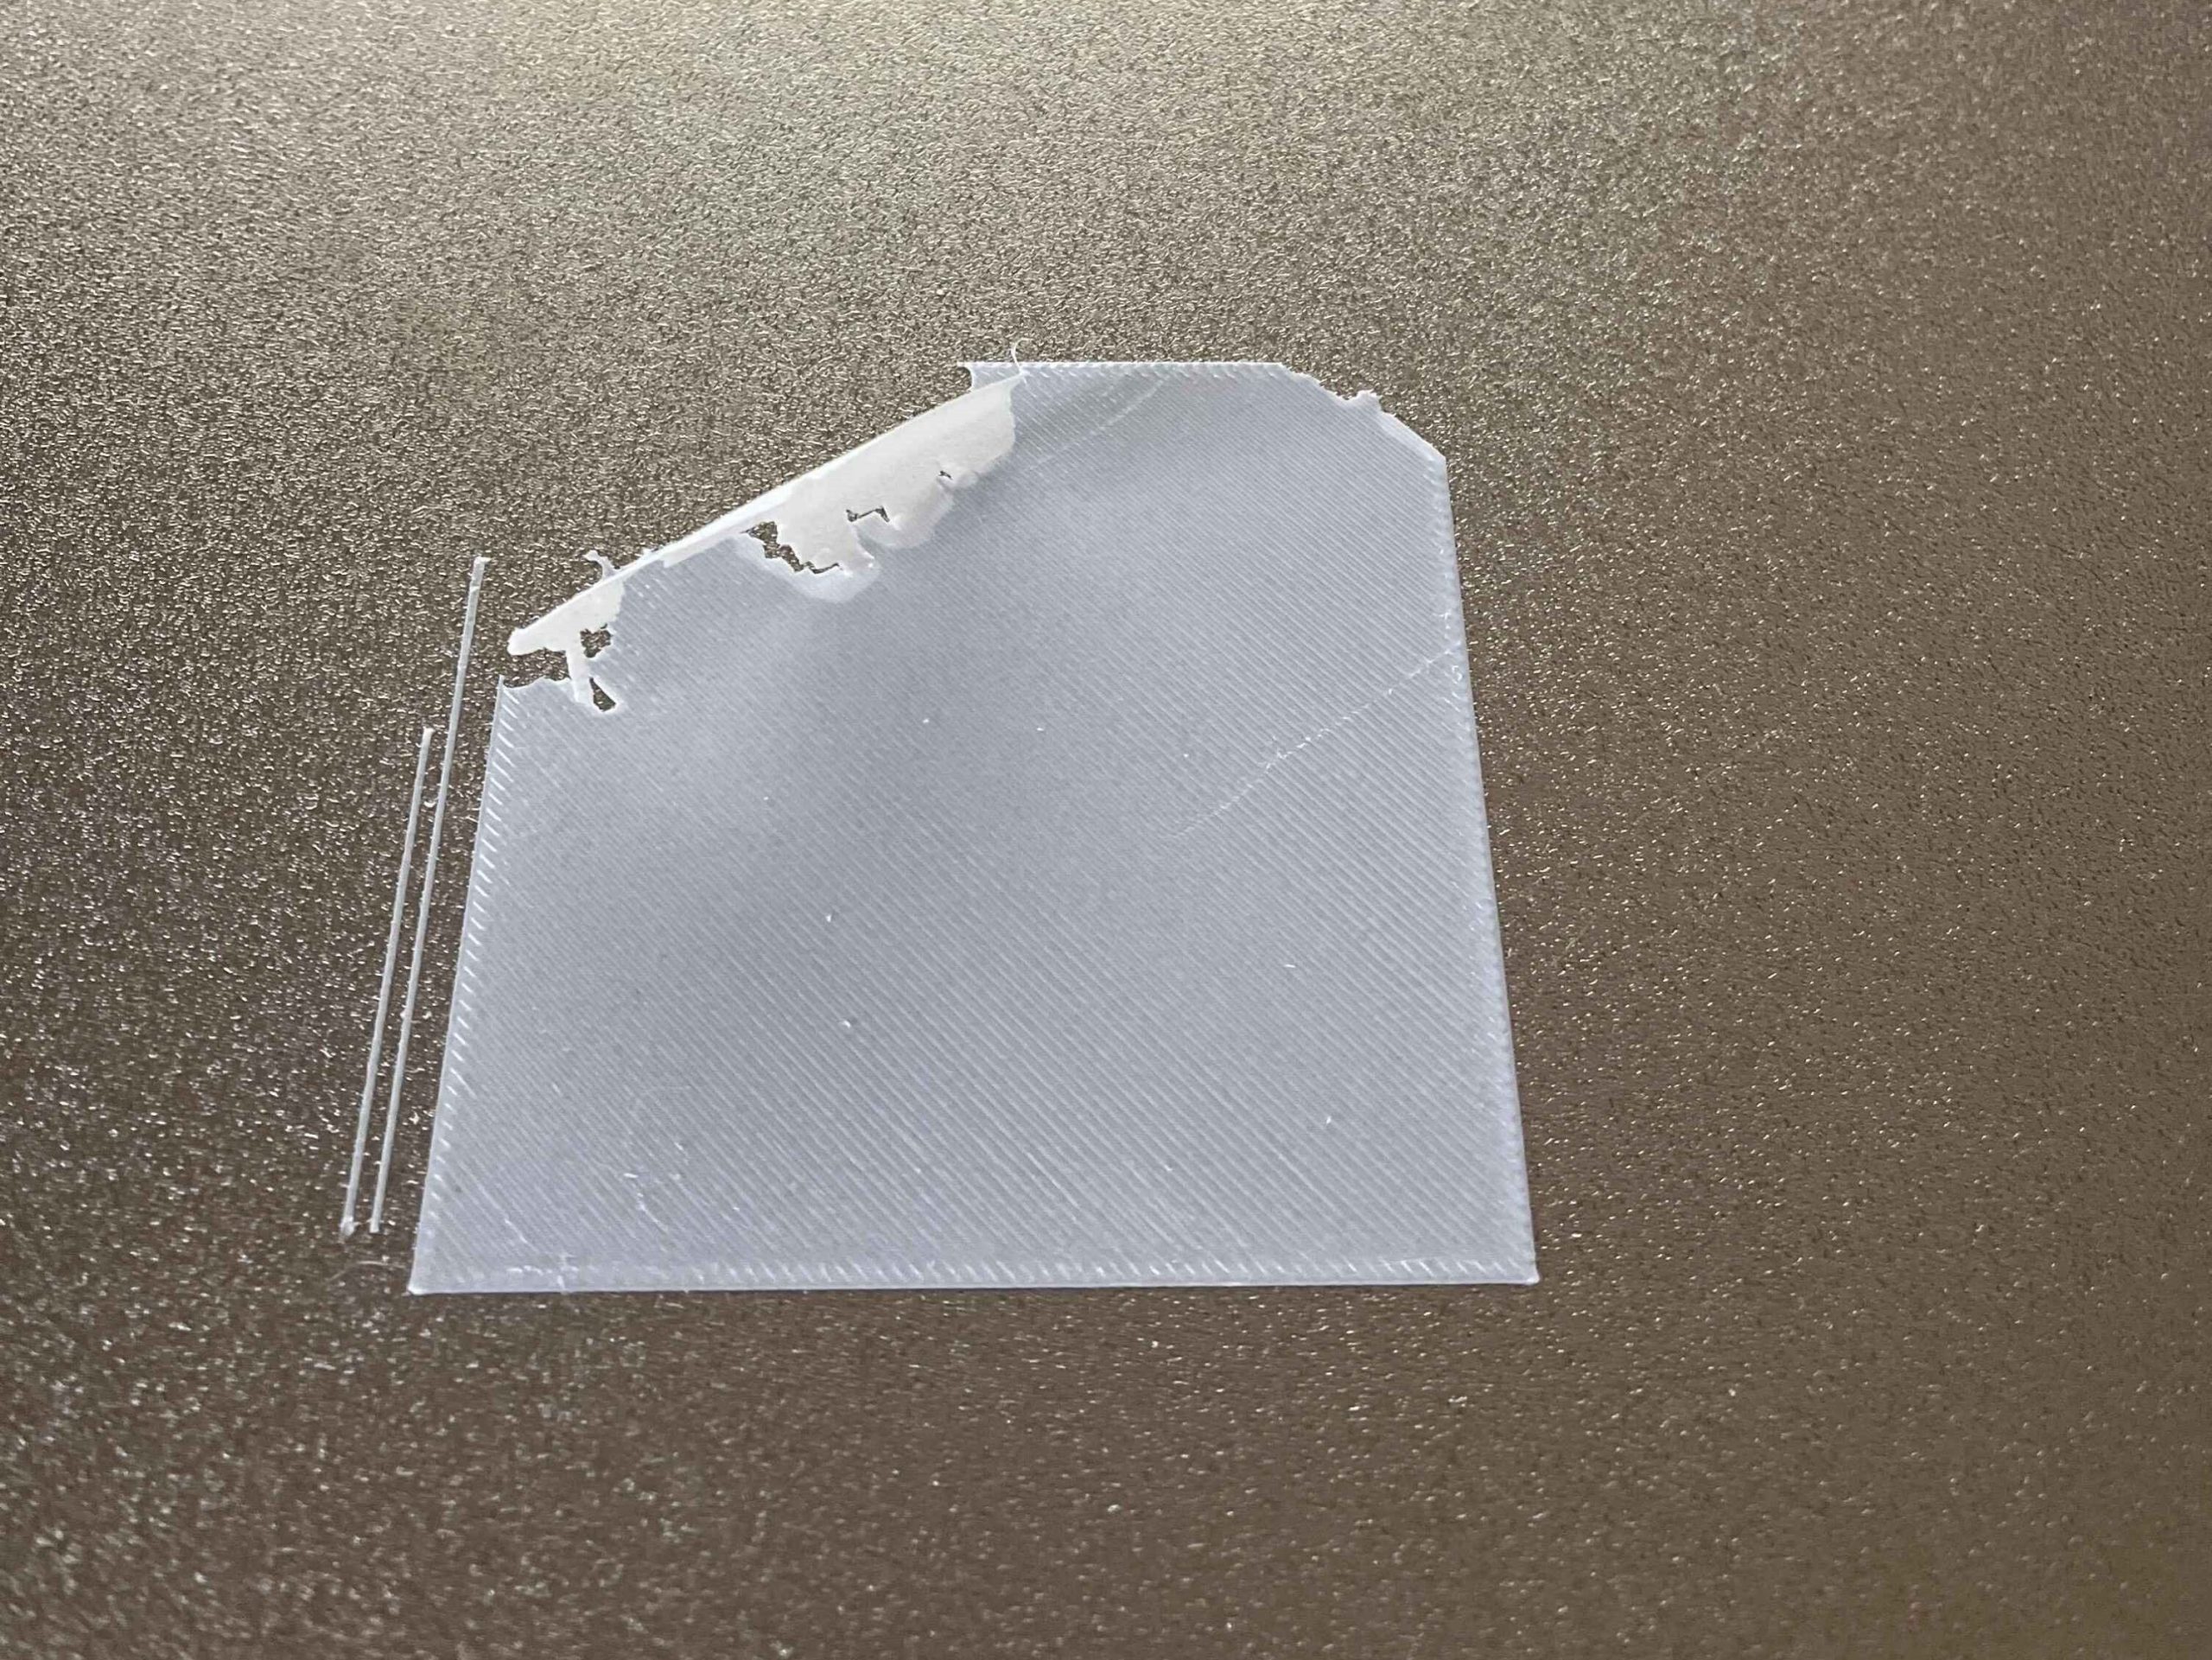
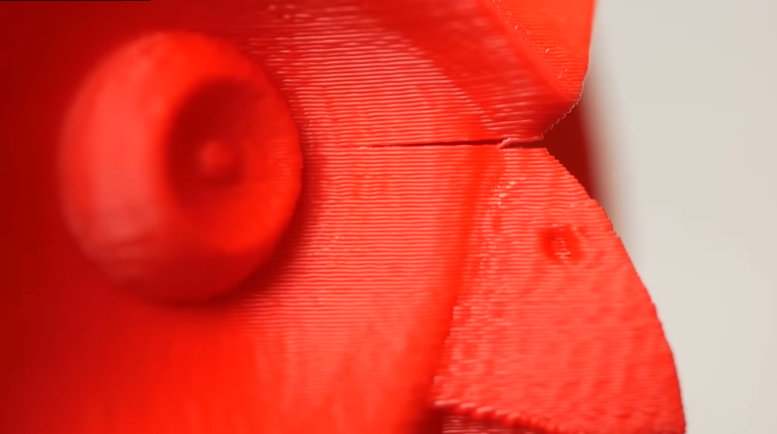
Poor Interlayer Adhesion
Interlayer adhesion determines the structural strength of a printed object, and PETG’s potential for strong layer bonding can be undermined by incorrect settings or poor filament handling. When layers fail to fuse properly, parts may split along layer lines under minimal stress. This not only affects functionality but also makes prints more susceptible to mechanical failure.
Reasons and Solutions
- Low Print Temperature: Insufficient heat prevents proper melting and bonding between layers.
Solution: Raise the PETG temperature by 5–10°C within the 220–240°C range to improve flow and bonding. Test incrementally to avoid stringing. - Excessive Cooling: High fan speeds or early cooling solidify PETG too quickly, reducing layer fusion.
Solution: Disable the fan for the first 2–5 layers, then use only 10–30% PETG fan speed for overhangs or bridges. Small models may require slightly more cooling (up to 50%) for fine details. - Fast Print Speed: Rapid printing limits the time for layers to bond.
Solution: Set outer wall/perimeter speed to 40–60 mm/s to allow sufficient bonding time. Adjust infill speed to 60–80 mm/s for efficiency without sacrificing quality. - Under-Extrusion: Incorrect flow or line width settings result in insufficient filament deposition.
Solution: Verify E-steps (extruder steps per mm) using a calibration test. Adjust the flow rate in the slicer to 95–98%, or slightly higher (103–105%) if the under-extrusion issue persists.
Nozzle Clogging
For those of us printing with PETG, nozzle clogs or jams can be a very common and frustrating problem. It can cause under-extrusion, skipped layers, and even complete print failure. PETG is a fairly sticky material in its molten state and can adhere to the nozzle when it’s printing at temp, therefore, when the filament begins to cool in the cooler area of the nozzle, it can lead to partial or total stops.
Reasons and Solutions
- High Print Temperature: Excessive heat causes the filament to carbonize with an incorrect PETG nozzle temp.
Solution: Reduce the print temperature to 220–240°C to minimize carbonization. - Low Z-Offset: The nozzle dragging on the print creates backpressure, leading to clogs.
Solution: Ensure the nozzle is at the correct height to avoid dragging on the print. Use a first layer test to confirm. - Filament Residue: Molten PETG sticks to the nozzle and burns, forming blockages.
Solution: Inspect the nozzle before and after prints. Clean with a wire brush while hot or perform a cold pull to remove residue. Replace the nozzle if clogs persist.
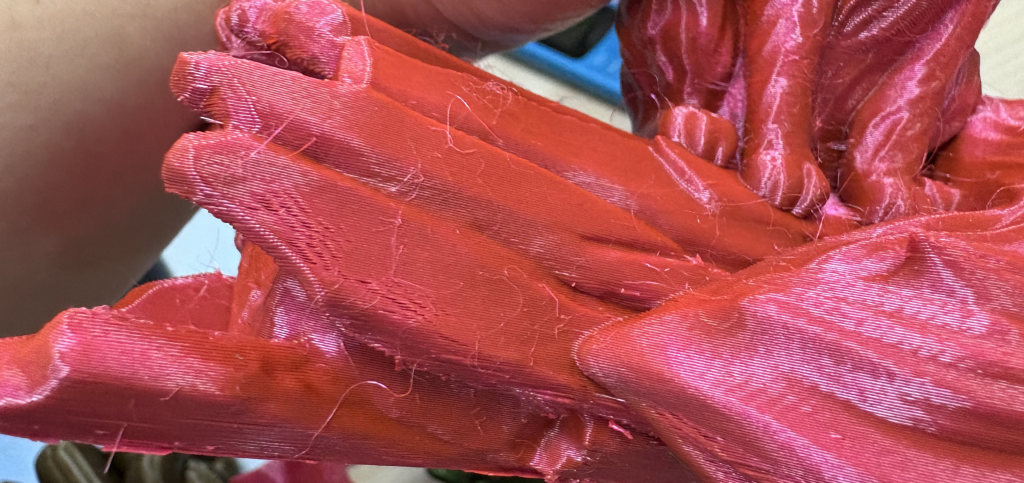
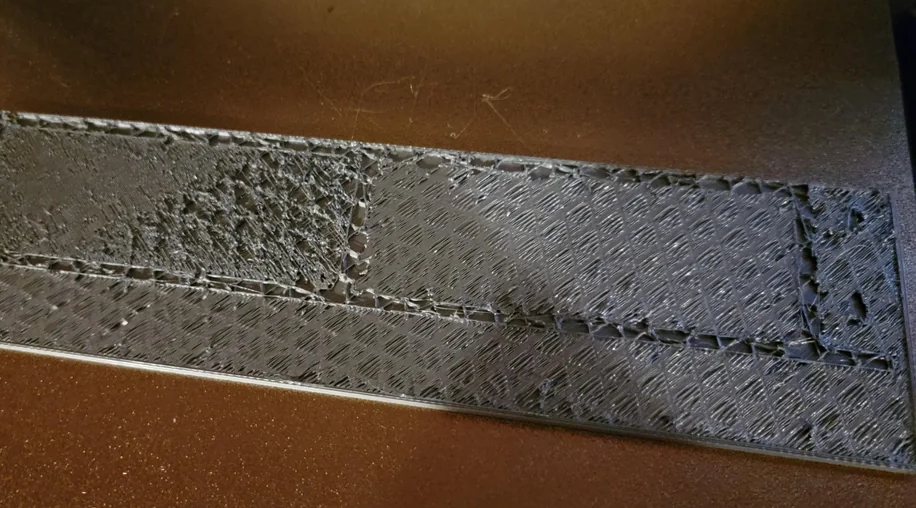
Rough Surface
A rough or inconsistent surface finish not only looks bad, it can also signal more problems with extrusion or not the best filament quality. Blobs, zits, or stringy textures on outer layers can mainly be contributed to over-extrusion, wet filament or a variable temperature.
Reasons and Solutions
- Over-Extrusion: Too much filament flow or the nozzle being too close to the bed creates blobs, zits, or uneven layers.
Solution: Make sure your extruder is calibrated by verifying E-steps and setting the slicer flow rate between 95-98%. Print a single wall cube to make sure this is accurate. - Low Z-Offset: An overly low nozzle height causes filament to be excessively squished, leading to bulging layers and artifacts.
Solution: Raise the Z-offset slightly to allow the nozzle to lay down smooth, even lines without excess pressure. - Wet Filament: PETG filament can sometimes absorb some moisture from the air that can lead to bubbles, uneven flow, and defects in the surfaces or contours of prints.
Solution: Try drying PETG in the oven or using a filament dryer to remove the moisture. Also store your filament in an airtight container with silica gel when not in use.
Conclusion
When troubleshooting PETG printing, you must come up with a systematic methodology. There are issues you may want to consider: stringing, adhesion and interlayer bonding, clogs, and rough surfaces. These issues will require several adjustments to temperature, retraction, cooling, and bed prep. With proper adjustment and testing, your PETG prints will print consistently and with excellent quality.