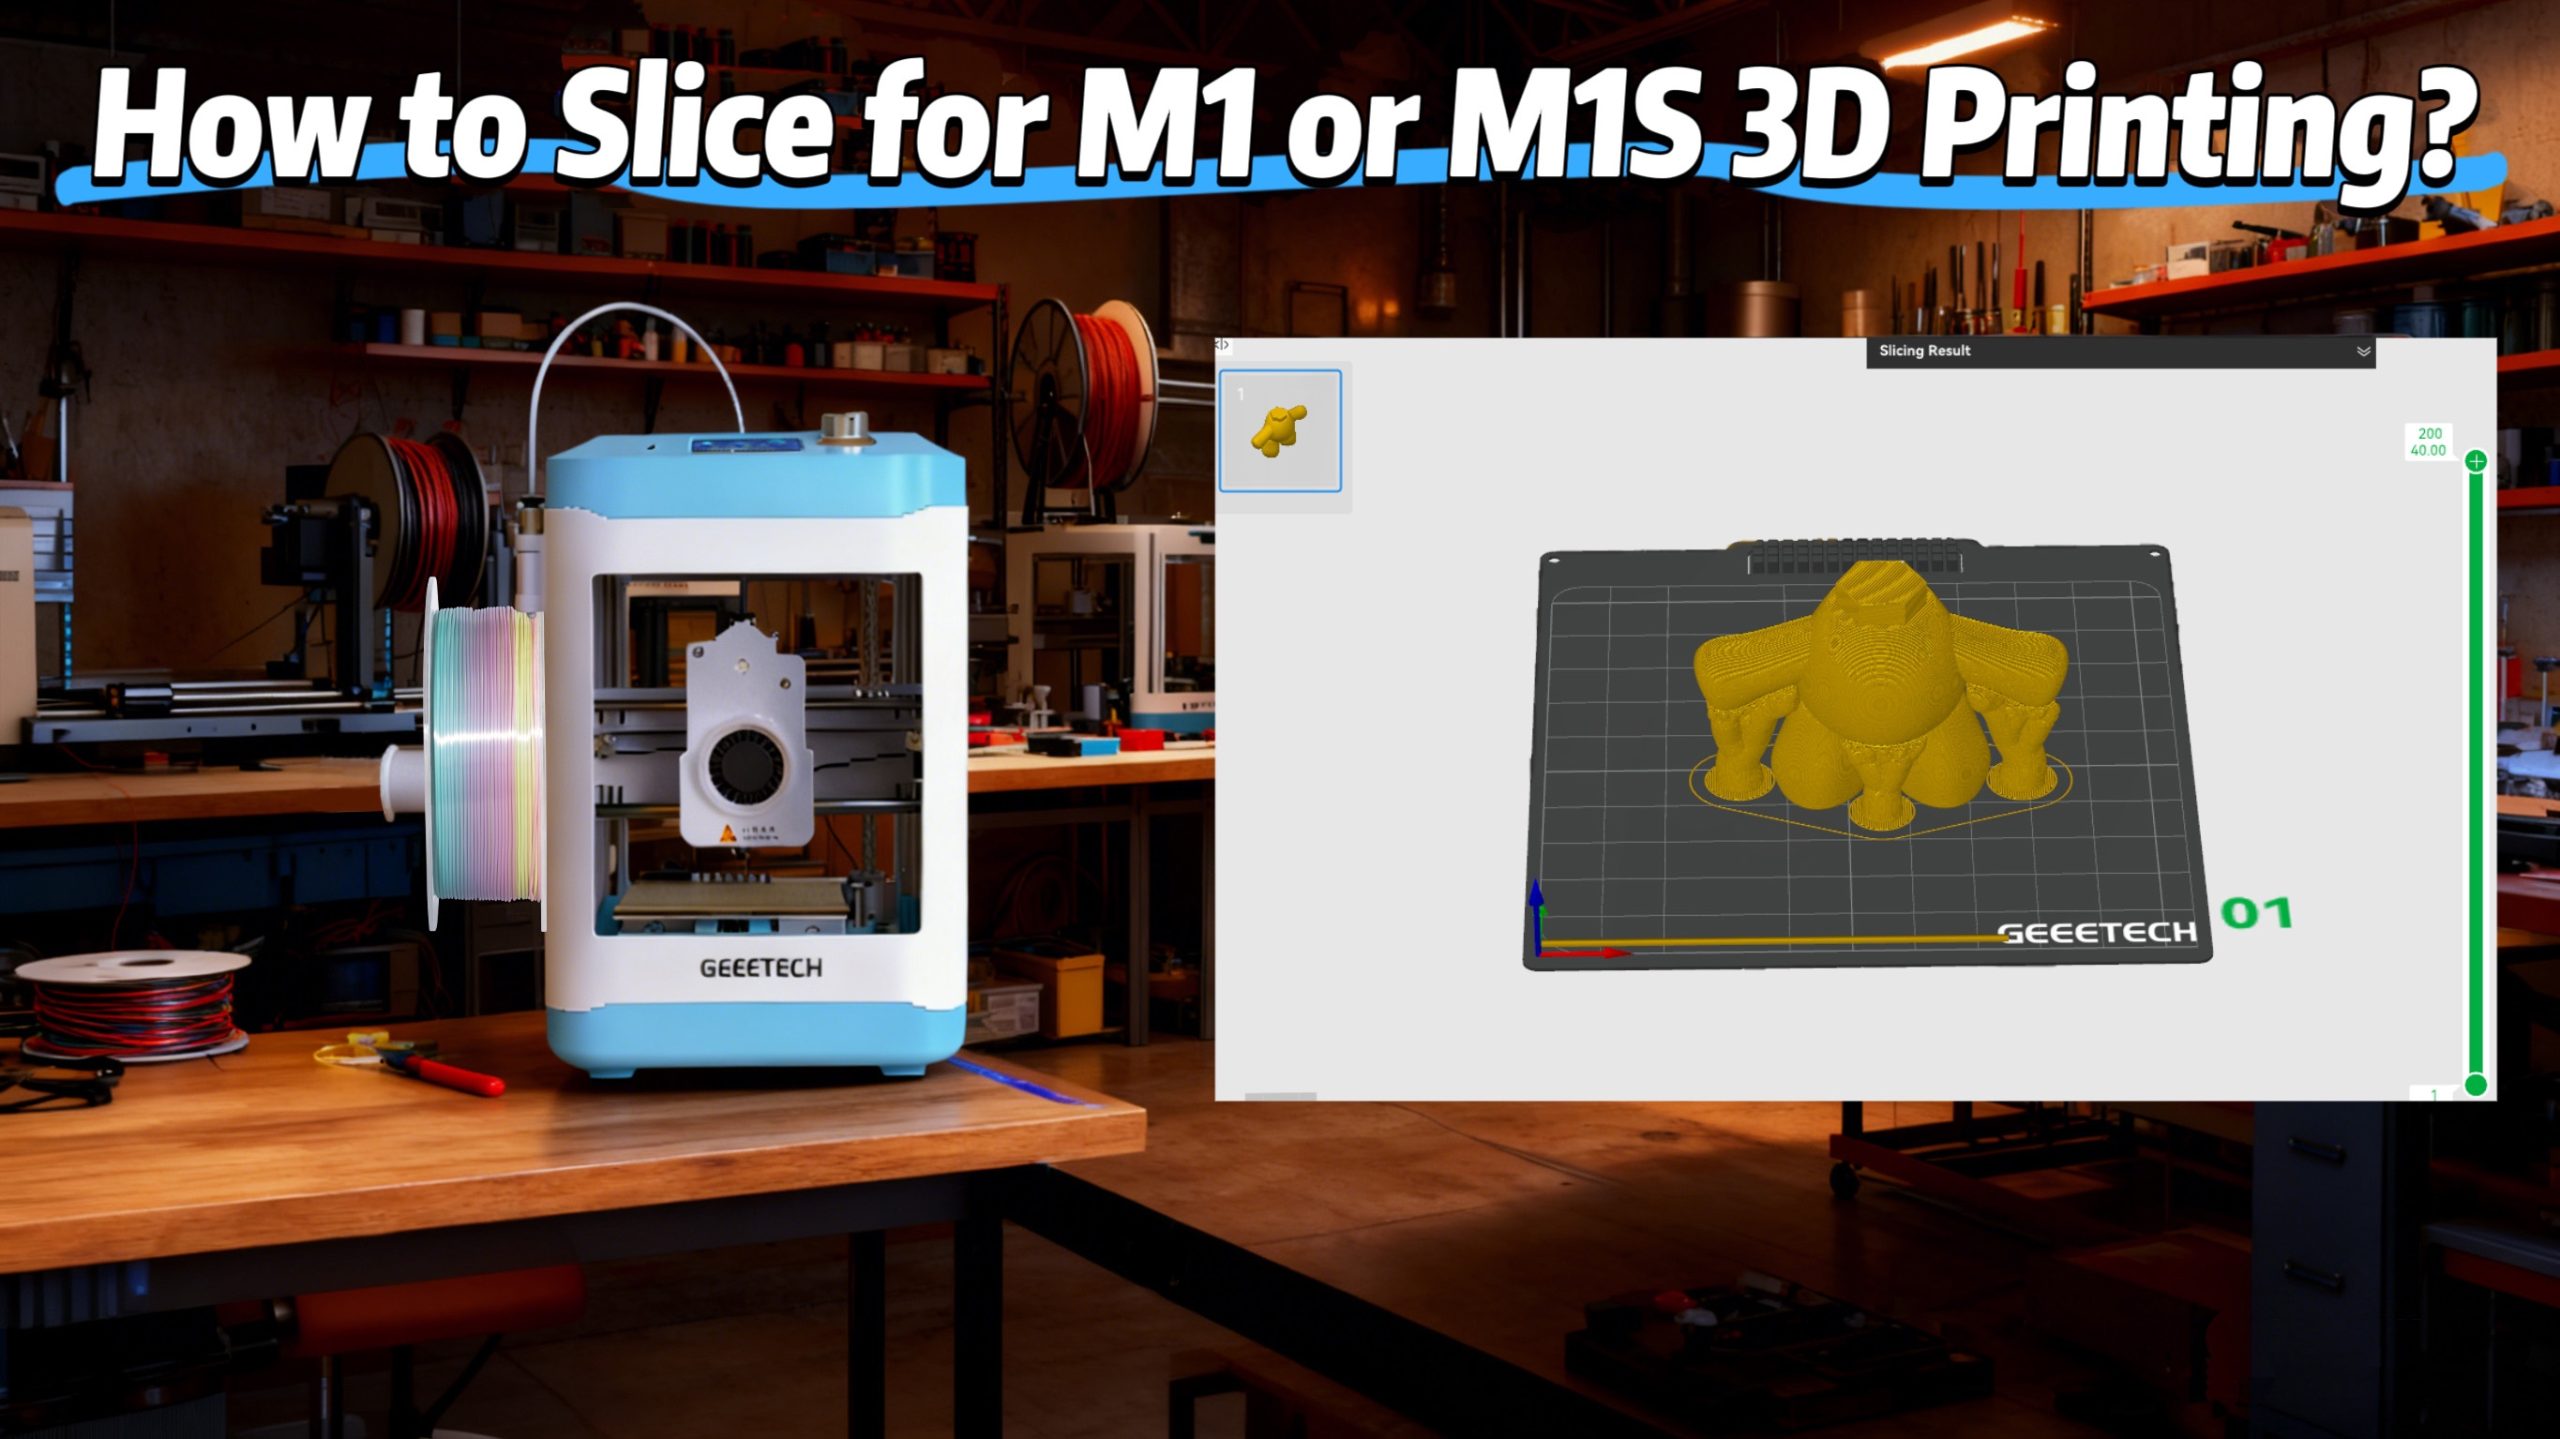
Recently, many users with M1 and M1S have been troubled by slicing, and that’s why this article was created.
Most users know what is slicing and its working principle and normal processes. If you need to review, click here: Slicing Introduction: What Is Slicing in 3D Printing?
At present, we are using third-party 3d printing slicers, because our newly launched software “Geeetech” for remote control 3D printer only, more abundant features such as slicing, editing and repairing… are still under development. Once there are any new features, they will be announced through the official channels. Stay tuned! Can’t wait for it to become the best slicer for 3D printing of M1 and M1S.
Now, let’s slice with the following free 3d printing programs.
Orca Slicer
Following, we will introduce how to use Orca Slicer.
BTW, if you prefer to watch a video, please refer to the video below:
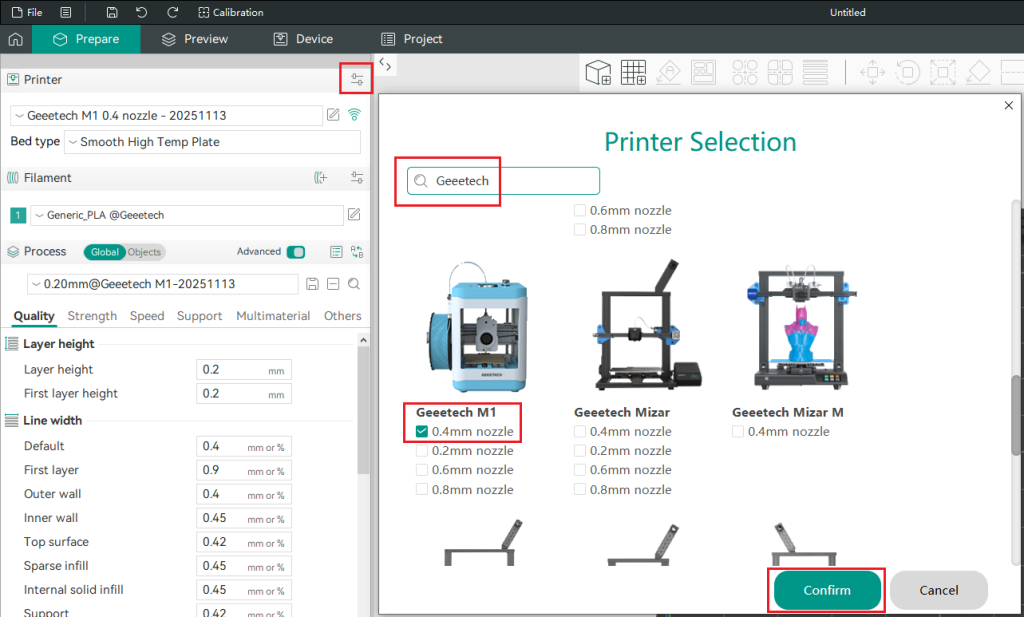
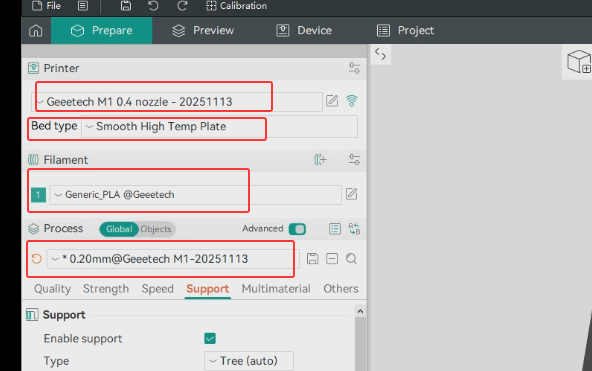
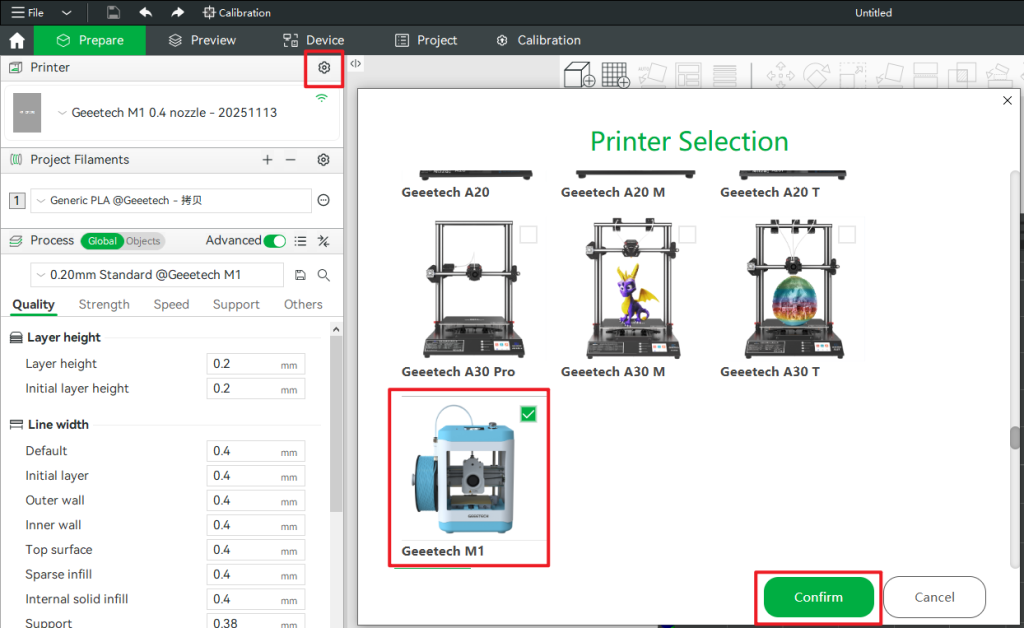
1. Configure Device and Filament Information
Configure the 3D printer and filament properly. This part of the information will affect the entire 3D slicing process.
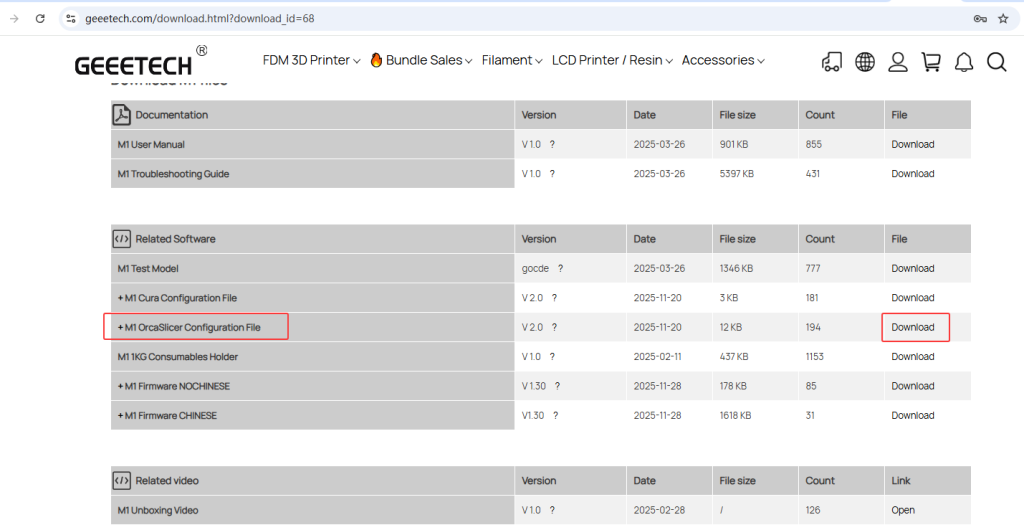
We can select related information manually, refer to the image.
Or download the configuration file from here directly and import it to your slicer. The configuration file includes a 3D printer profile and matched settings with various types of filaments.

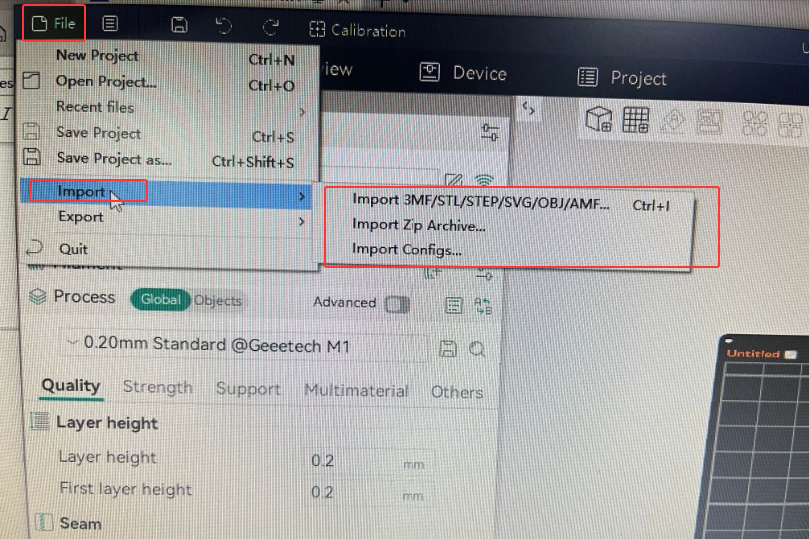
2. Import Your Model File
Click “ File – Import – choose format that matches your file.”
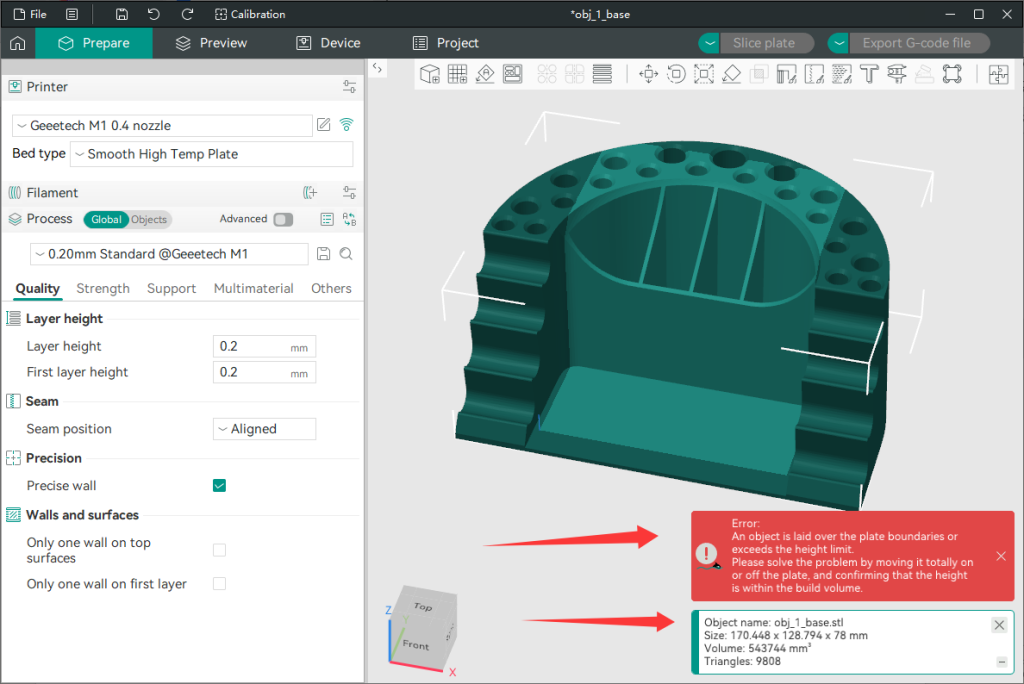
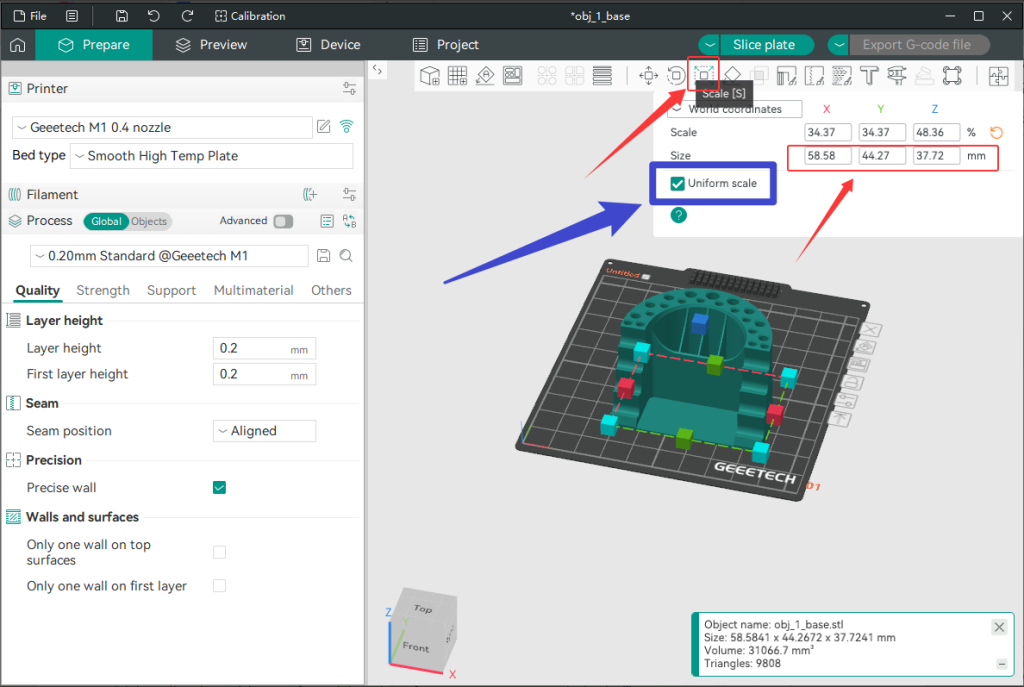
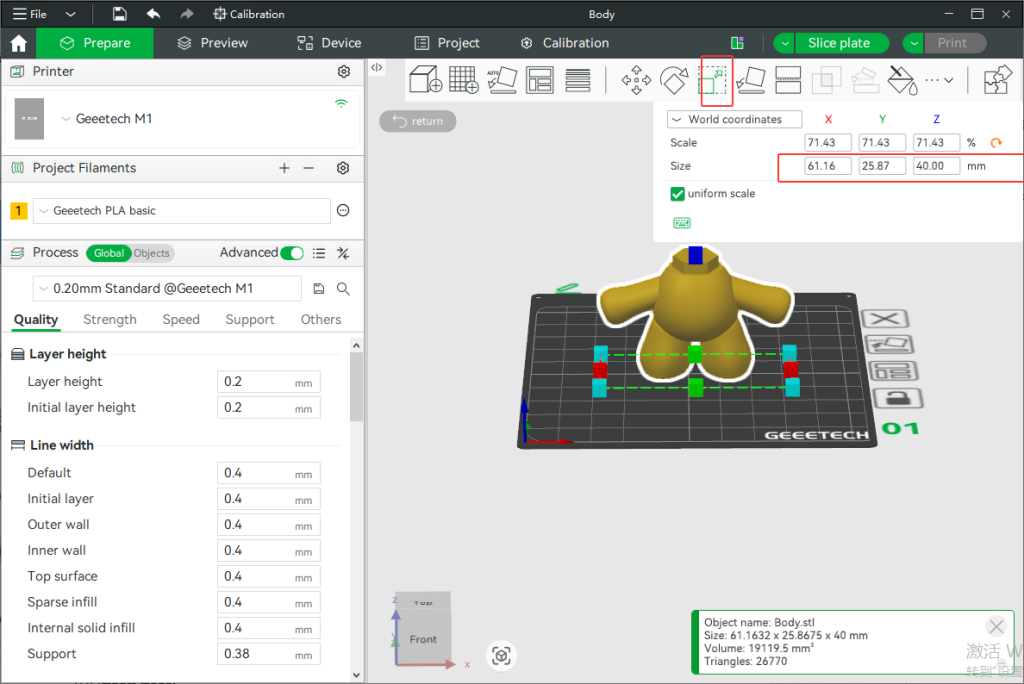
3. Resize
The size of the imported 3D model is designed by the designer. Sometimes it doesn’t match the size of the plate, or if you want resize it to match your needs. Follow the operation.
Click “ Scale” to set the size you want.

If you want to change one of X, Y or Z, you can uncheck “uniform scale” to achieve it.
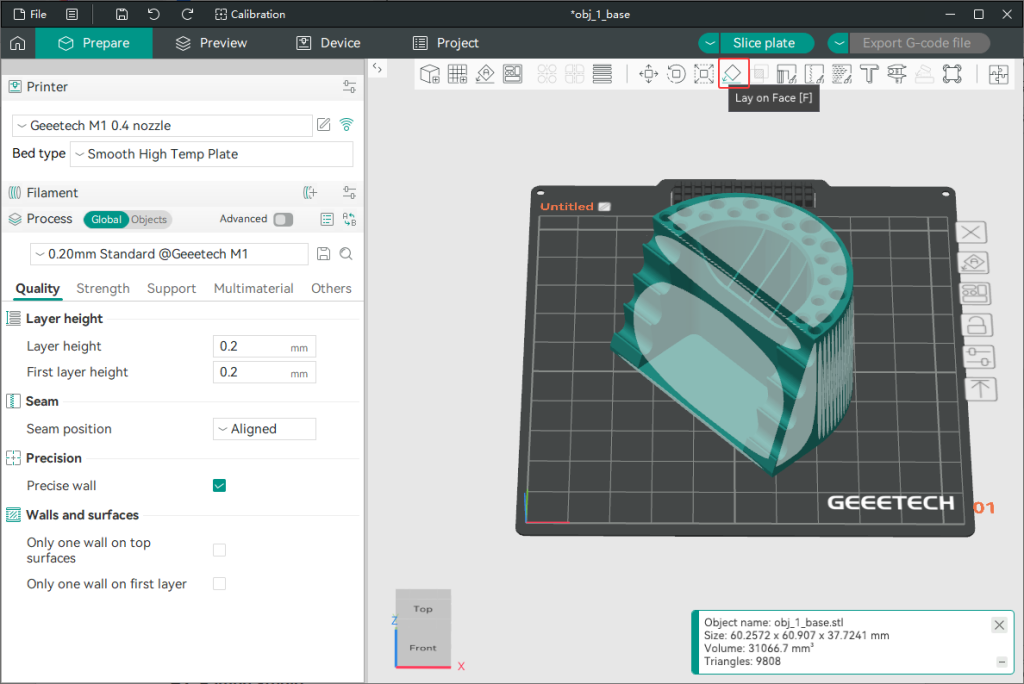
4. Lay on Face
If you need to adjust the contact surface between the model and the hot bed or check the condition of contact surface, you can do it like this:
“Click to select the model- Lay on Face – Click on the surface you want it to contact the hot bed”.
And you can rotate the cube in the lower-left corner or the build plate by left-clicking and holding the mouse button to get a better view of the model.
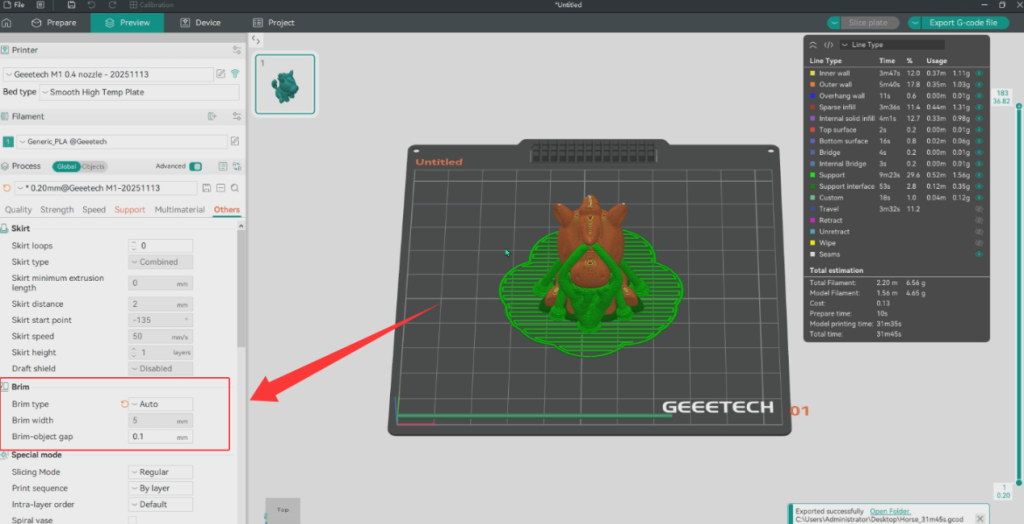
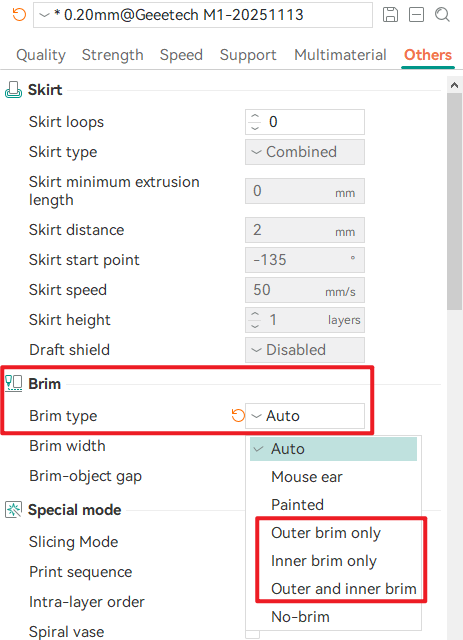
By observing the contact surface in this way, we will find that the contact surfaces of some models are very small, to prevent warping and improve insufficient adhesion, a brim is usually recommended. Generally, Auto is set by default. If you are still worried about poor adhesion, there are 3 options that can be set; choose one of them. We have also provided a detailed explanation of brim. Please refer to What Is a Brim in 3D Printing and When to Use It.
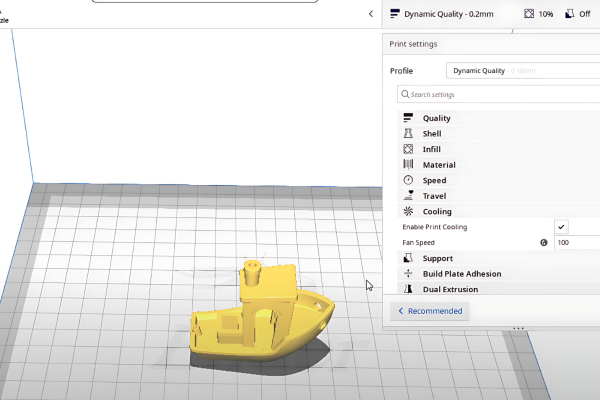
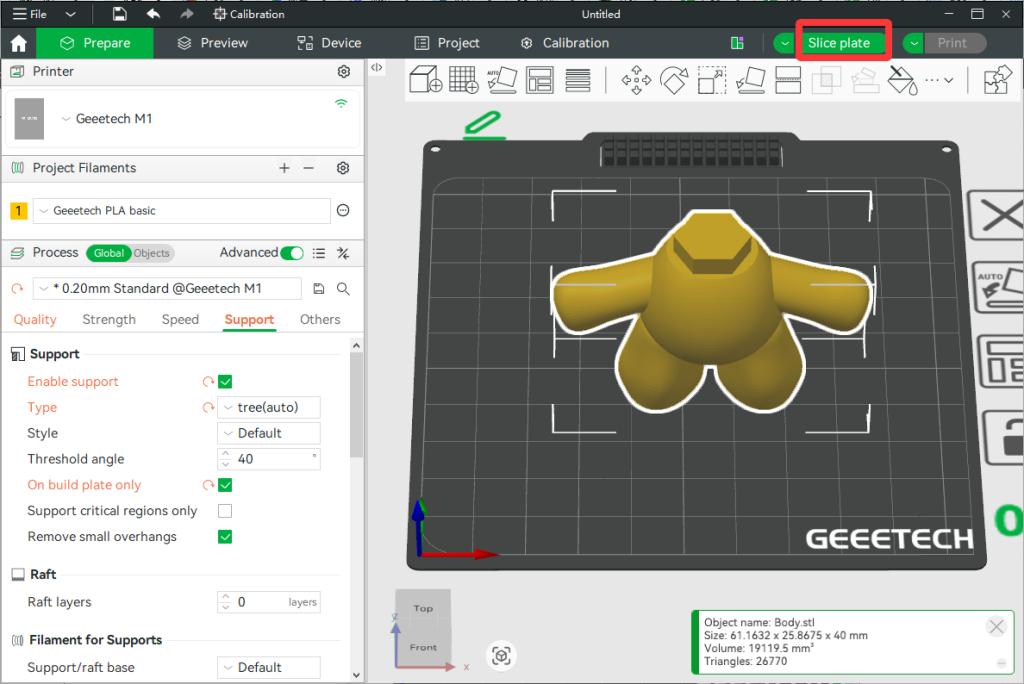
5. Configure Settings
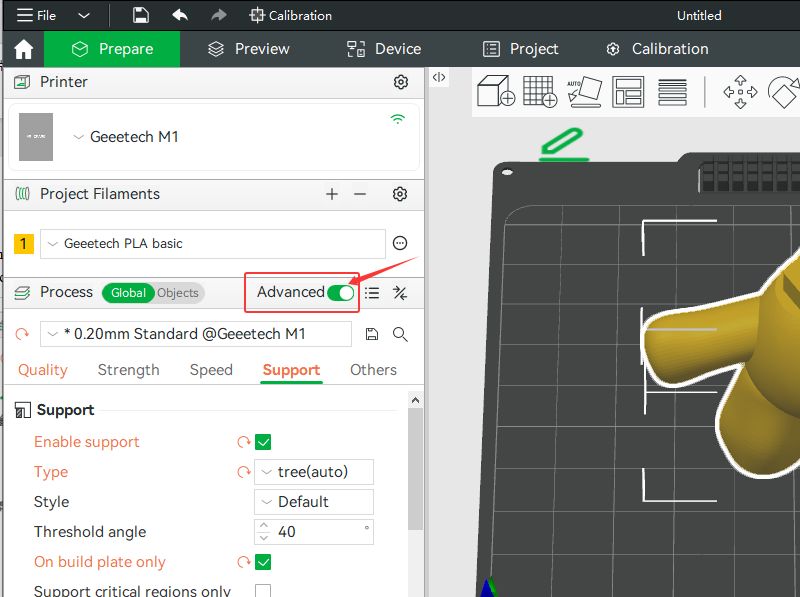
More detailed settings here: Open “ Advanced “.
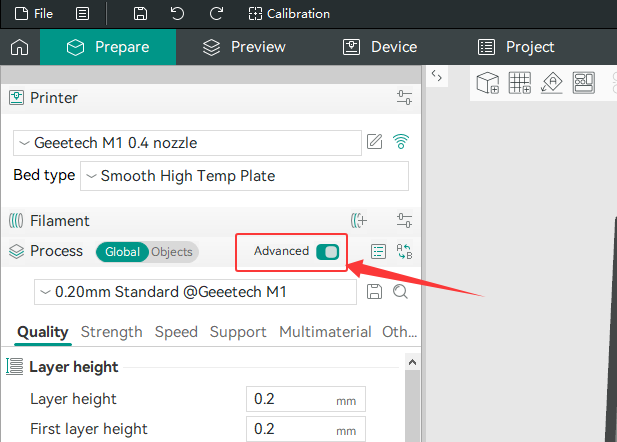
We can set Quality, Strength, Speed, Support… in this section.
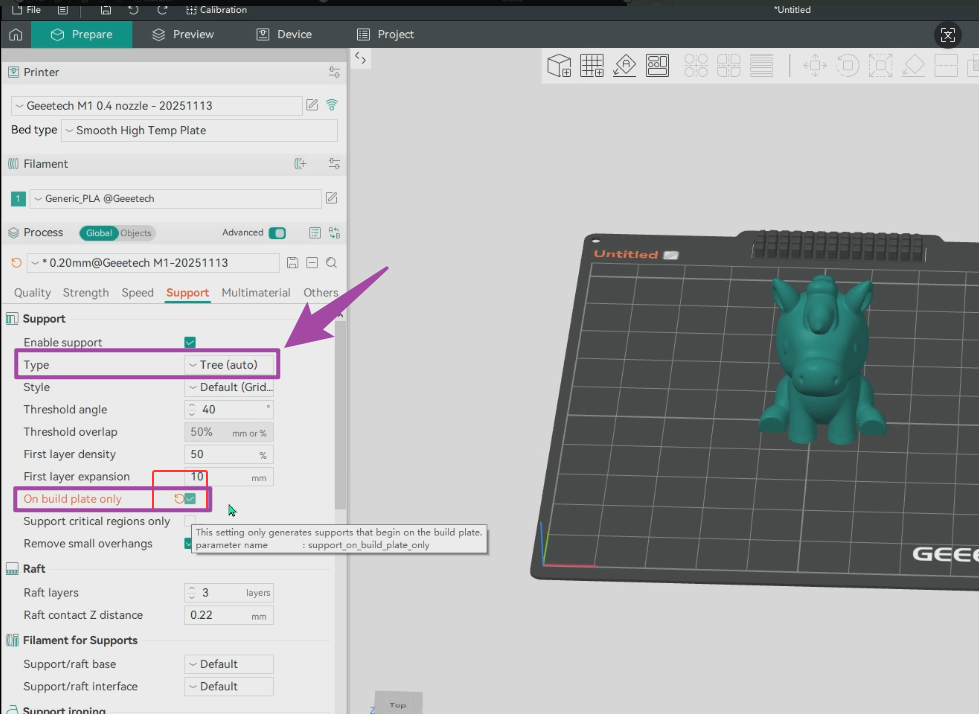
For beginners, some settings, we recommend starting from the default. Of course, trying a few custom settings is also supported, such as “Support”. The setting of the support is an exception. We recommend that beginners use the “tree” support and set “on build plate only” rather than the default, as the two settings offer higher print success rates, easier support removal, and fewer chances of damaging the model. More detailed tutorial: Ultimate Guide to 3D Printing Supports.

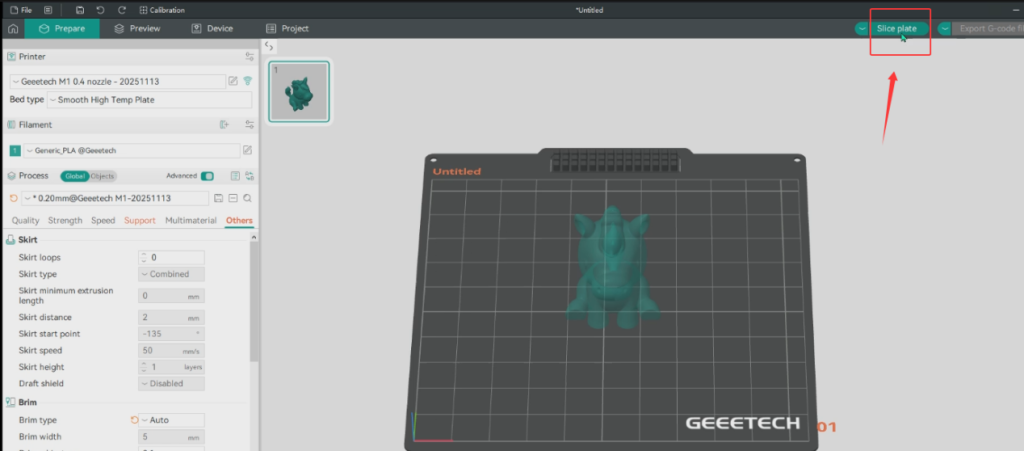
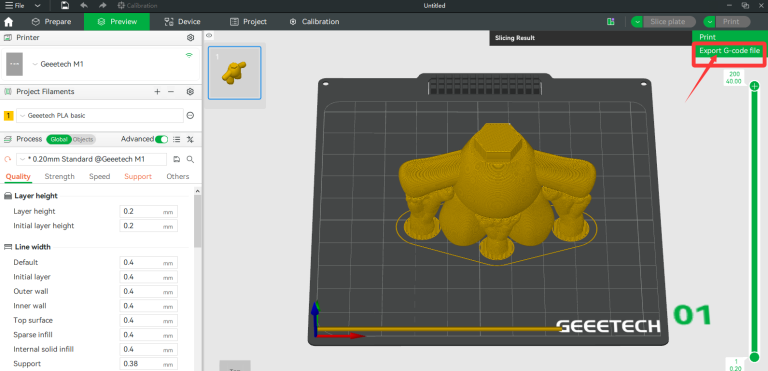
6. Slice the Model
When all settings are done, click “Slice plate”.
7. Export G-code File
Click “ Export G-code file” to export Orca Slicer process settings and store to your SD card.

8. Send to 3D Printer
Transfer the G-code to your 3D printer via SD card, and start printing.
Bambu Studio
Bambu Studio is very friendly to beginners as 3D printing software, which automatically generate slice parameters, and there is rarely a need for manual parameter adjustment. Then, how to use Bambu Studio?
The operation of slicing in Bambu Studio is almost the same as that in Orca Slicer.
1. Basic Information
Add your 3D printer and filament information. This is the foundation of 3D slicing.
2. Import 3D Print File
The import step is the same as Orca Slicer.
3. Size
Click: “Scale” to resize.
The same as Orca Slicer, if one of XYZ needed to be changed only, then uncheck “uniform scale“.
4. “Lay on Face” to Set Contact Surface
The function of “Lay on Face” is: Select a certain surface of the model and make this surface automatically “stick” onto the printing platform.
Putting the largest and smoothest surface stick to the hot bed is recommended, which reduces the risk of warping and enhances the adhesion of the first layer.

5. Advanced Settings
The same as Orca Slicer, Quality, Strength, Speed, Support and Others can be set in the advanced mode.
6. Slicing
Finish all settings, then click “Slice Plate” to complete the slicing.
7. Export G-code
Bambu Studio doesn’t support printing online directly for Geeetech 3D printers, so we click “Export G-code file” here.
8. Send G-code to 3D Printer
Store the G-code to SD card, then send it to your 3D printer.
Bind M1S Mini 3D Printer to the 3D Print APP
Slicing is finished, another important operation is binding M1S to our 3D print APP—Geeetech. It can be printed remotely after binding. Below is a beginner-friendly, step-by-step guide.
1. Download
The 3D print APP named “Geeetech“.
Geeetech supports IOS and Android systems. It has been listed on Apple’s APP Store and Google Play, and it can also be downloaded from our official website. Click here.
2. Register
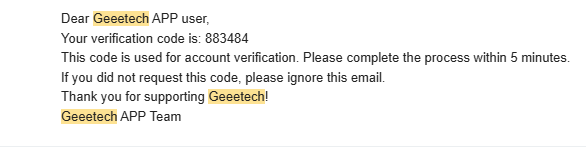
Email, verification code and password are required for registration.
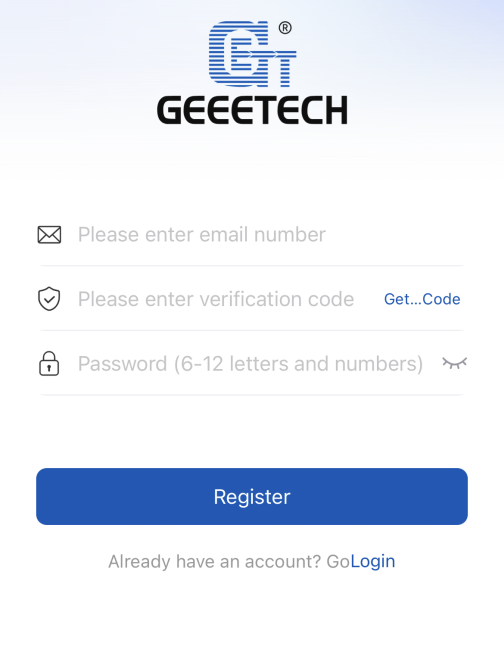
Some users were troubled in verification code receiving. We’d like to offer two possible ways to resolve it.
- Check spam box
Maybe the email system identified the verification code as a spam email.
- Use private and NO special characters email address to register
Some companies’ email addresses do not receive verification codes.
Gmail, Hotmail… are preferred.
Special characters include punctuation and other marks…( for example: jackie.Chan@example.com “.” is not allowed)
If the problem persists, please contact us.
3. Bind and Connect
Video walkthrough:
Jump to 1:17 for the APP bind part.
Tutorial with text and images:
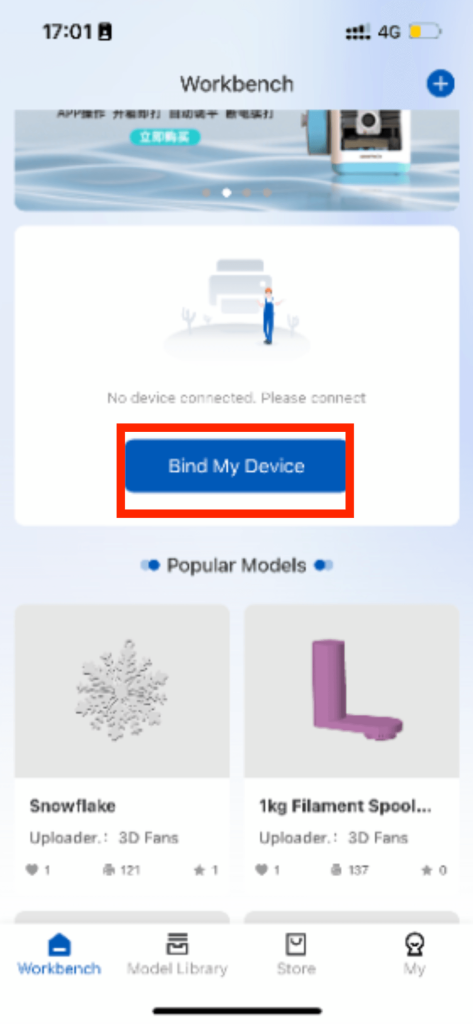
Click “ Bind My Device”
Steps:
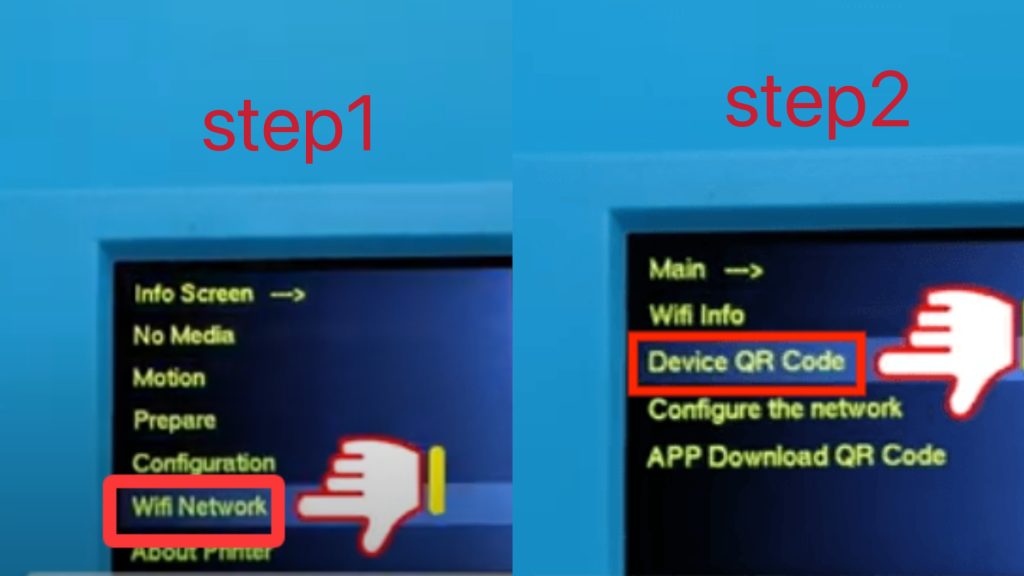
Open M1S, enter Main Menu
➡
Wifi Network
➡
Device QR Code
➡
Using APP to scan the QR code, then click “Binding” on the app
➡
Set the device name, then click “Next”.
➡
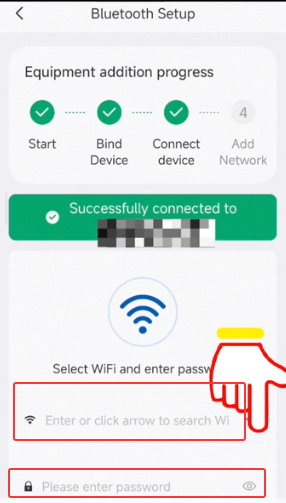
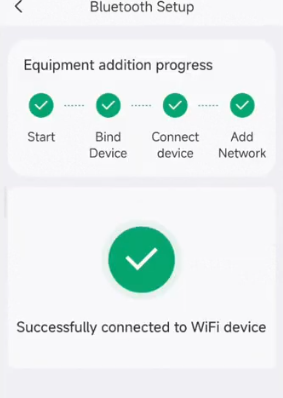
Click “ Bluetooth Setup” on the app, open the mobile phone’s GPS and Bluetooth, then the app interface shows “Successfully connected to [GXXXXXXXXXXXX]“.
➡
Enter or search your WIFI, then fill in your WIFI password.
Once the above steps are done, the connection is complete.
After a successful connection, the operation of M1S can be controlled by the 3D print APP.
More remote operation, please refer following video:
Jump to 2:12 for a demonstration of remote printing via the APP.